Change Summer Photo to Snowfall Winter Scene in Photoshop

In this photo effects tutorial, i will show you in detail how to turn or change any summer photo into realistic winter snow effect in photoshop.
Summer Photo to Snowfall Winter Effect Tutorial :
Let’s get started.
First desaturate the warm tones in order to give the image dull winter feeling.
Choose channel mixer.
Select Monochrome.
Adjust the percentages for the Red, Green and Blue channels.
Drag sliders while watching the live preview to find the best result.
Now select layer mask and go to image tab.
Add apply image.
It makes the colours washed out and give the photo cloudy and overcast feel.
Select the Background layer, then go to Select – Color Range.
Select option to Sample Colors, then click around on the canvas to sample different tones.
Try to find a selection that provides good contrast, while keeping an eye on the small preview box to see the result.
The Fuzziness slider can be adjusted to tune the brightness of the selection.
Delete unwanted selection using Marquee or Lasso tools.
Add new blank layer, while the colour range selection is active.
Then fill this area with white.
Deselect the selection.
Move the layer to top.
Apply gaussian blur to the layer to soften the edges. Choose small radius and then click ok.
Double click the layer to open the blending options window.
Select underlying layer. Hold the Alt key and drag the black slider
By doing this we will partially hide the gray portions, to achieve a better blending with the background image.
Now add curves adjustment.
In the Properties panel, click the Auto button to apply the Auto Contrast adjustment.
Create a new layer and fill it with black.
Go to Filter – Noise – Add Noise, configure the settings to 100%, Gaussian and Monochromatic.
Head straight to Filter – Blur – Gaussian Blur, and take the sharpness away from the noise by adding 1 pixel blur.
Change the blending mode of this layer to Screen.
Go to Image – Adjustments – Levels, Then drag the shadows slider towards the right, to reduce the density of the white noise, until it looks like a light flurry of snow.
Add another new layer, and follow the previous steps of filling it with black and adding the noise filter and then gaussian blur with 1 pixel.
Also add a Motion Blur filter with the settings of 10 pixels in a slight diagonal angle.
Change the blending mode of this layer to Screen.
Use the Levels to reduce the density of the snow pattern.
Then enlarge the layer with free transform tool.
Add a third snow layer, following the same steps, except this time alter the motion blur direction and scale up the layer even further.
These three snow layers will add depth to the effect, with large blurry snow flakes in the foreground, through to smaller snowflakes in the background.
Add a color lookup adjustment layer, and select a crisp winter preset.
Reduce the opacity to around 50% to apply a cool blue colour cast.
Sometimes bright white overlay is applied to areas where it isn’t required.
Add layer mask and use a soft brush to erase it from areas.
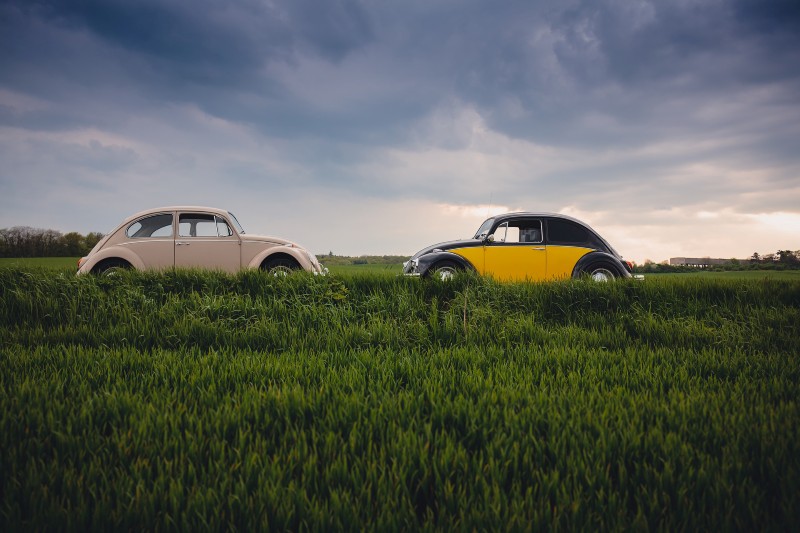
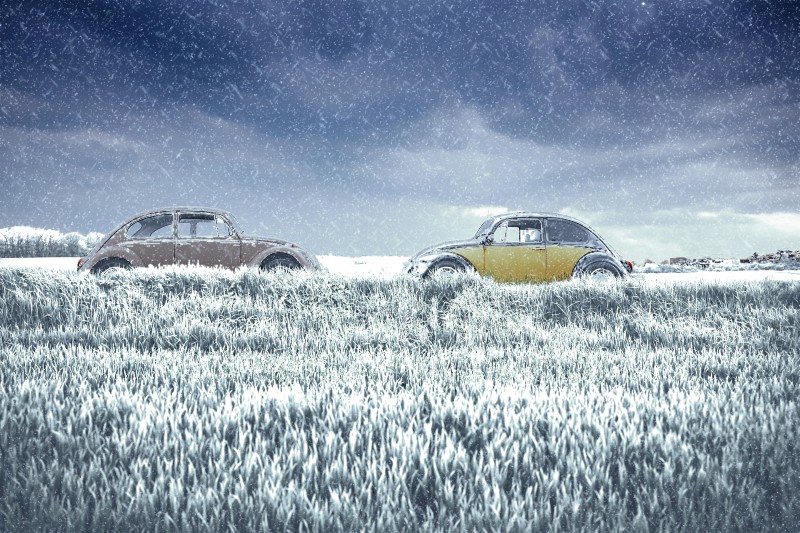
we’re done. Here is before and after manipulation.
[sociallocker id=”1411″][download-attachments][/sociallocker]