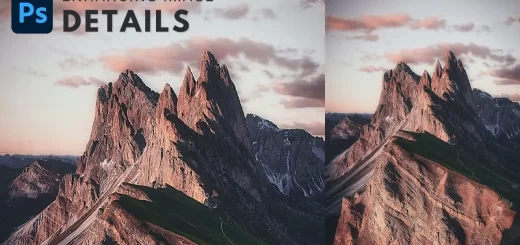
How to Create Cinematic Blockbuster Film Lut in Photoshop

In this video i will show you how To add color grading to your photos or videos using blend if tool in Photoshop and then we save it as Color Lookup Lut preset and apply to videos in adobe After effects, premier pro, Final Cut Pro X, Sony Vegas and more.
Create Film Lut Tutorial :
CLICK HERE TO WATCH TUTORIAL
Many applications can generate LUTs, but I find Adobe Photoshop to be ideal for the task, because of its simplicity of the process and overall amount of control.
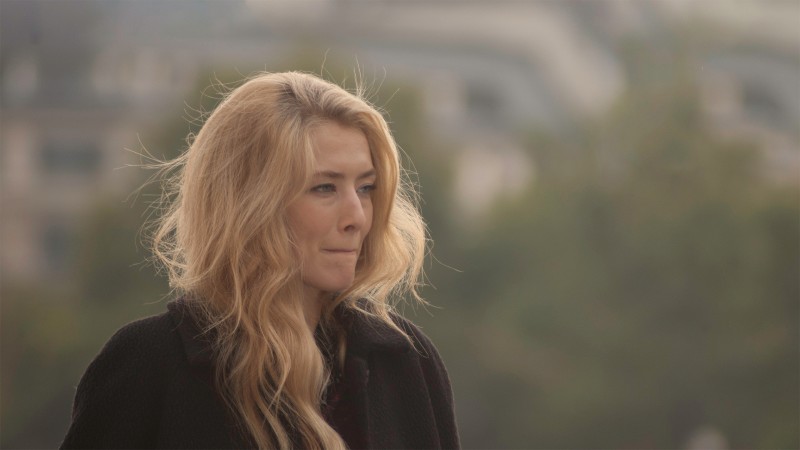
I want to change this photo into a famous blockbuster Hollywood movie look.
Ok let’s get started.
open your image or video in Photoshop.
My idea here is to add teal or blue color tone to shadows and the orange tone to the highlights.
To do that I use two solid colour layers, one for shadows and other for highlights.
Go to adjustments and add solid color layer.
Choose color of ur choice, in this case i select dark teal.
Now change the solid color layer blending to soft light.
Look at the image!!! color effect applied to the whole image. but i want the teal to only affect the dark areas of the image.
So we use blend if tool to fix it. just right-click the layer and select blending options.
Go to blend if section and keep everything at default.
The important slider here is Underlying Layer. As i said before we need to minimize the affect from the highlights.
So Drag the white triangles to the left and you will see that the teal starts to only affect the shadows.
Hold Option or Alt Key clicking on the triangles splits them so you can feather the blending effect.
click ok to apply changes.
Now do the same for the highlights.
Go to adjustments and add solid color layer.
Select orange color.
Change the solid color blending to soft light.
Double click on the layer to get the layer options panel
This time, however, we want to preserve the highlights so drag the black triangles to the right.
Once again Hold Option or Alt Key, split them to feather the blend.
Click ok.
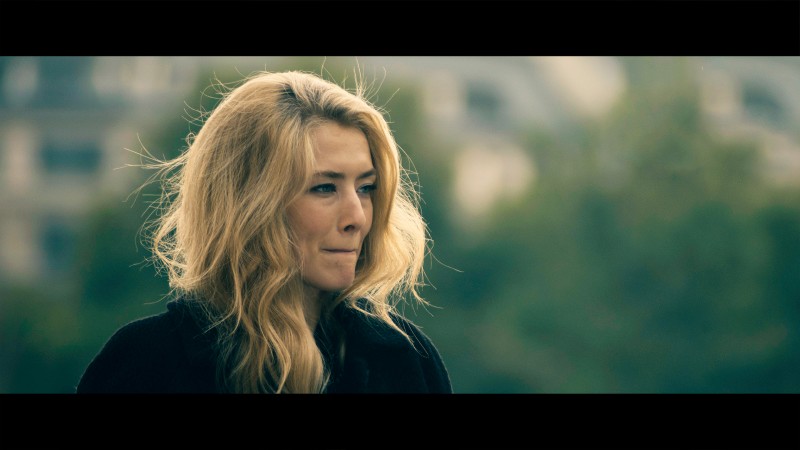
We applied the color tone.
Now make some tweaks to highlights and shadows using curves adjustment.
Increase highlights little bit and crush black areas in the image to give faded film look.
Final step. i want to add Letterbox to give image Widescreen Movie feel. this is optional, u may skip this step.
Take crop tool and crop it to 16:9 format.
If you want to make any changes to color, simply double click on solid color and change colors to your liking.
Now i will create lut to this effect.
Go to File menu > Export > Color Lookup Tables and then choose your settings and save.
You can download and install in After Effects, adobe premier pro and sony vegas pro.
You can use this preset to color grading to your video easily with just one click.
[sociallocker id=”1411″][download-attachments][/sociallocker]