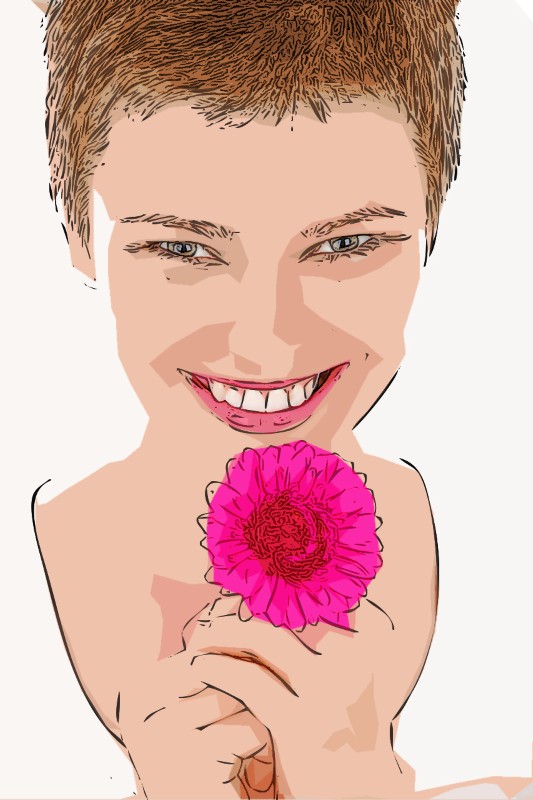
How to Create Line Art Sketch Cartoon Drawing in Photoshop

In this photoshop photo effects tutorial, learn how to create line art sketch drawing cartoon effect in photoshop.
Line Art Effect Photoshop Tutorial :
CLICK HERE TO WATCH TUTORIAL
Open image and duplicate it (CTRL + J).
Now sharpen the layer using unsharp mask to improve texture and detail.
Go to Filter – Sharpen – select Unsharp mask. Keep amount: 137%, radius: 2.9px and threshold: 1.
Now add reduce noise to smoothen the details.
Go to Filter menu – Noise – select Reduce noise. Keep strength: 10, Preserve details: 0, Reduce colour noise: 45% and Sharpen Details: 0.
Highlights are good enough but i want to increase shadow details little.
Go to image menu – adjustments – select Shadows/Highlights. Increase shadows amount slider to 50%.
Now once again add Unsharp mask to greatly enhance the appearance of detail.
Go to Filter – Sharpen – select Unsharp mask. Keep amount: 500%, radius: 2.7px and threshold: 0.
Now apply smart blur to the layer.
Go to Filter – Blur – select Smart blur. Keep radius: 57, threshold: 97, quality: high and mode: normal.
Image color, sharpness & important detail are retained, noise & grain are virtually eliminated.
Now to go filter gallery and apply photocopy filter to give layer a line art effect. Keep detail: 1 and darkness: 50.
Then head to Filter – Stylize – Diffuse to add cool brushed appearance to line art. Change the Diffuse mode to Anisotropic.
Now increase levels of threshold to remove shades of grey in the layer.
Go to Image – Adjustments – Threshold. Keep level: 128.
Go to color range to select whites in the layer. Inverse select (SHIFT + CTRL + I) to select blacks.
Keep selection active. Make a new blank layer (SHIFT + CTRL + N).
Go to paths panel. Click on make work path from selection button.
Select work path, right-click and select fill path. Fill the work path with black color.
Simply click in the gray area below the path to deselect the work path or press Esc.
Go back to layers panel and new layer appeared with the work path drawing.
Let’s make line art little darker.
Hold CTRL key and click on layer thumbnail to make a selection.
Go to Edit menu – Fill the selection with black. Deselect the selection (CTRL + D).
Now duplicate original background layer & convert to smart object.
Go to filter gallery and select cutout filter. Keep levels: 8, simplicity: 6 and fidelity: 1.
Select background copy layer (first line art) and change blending to overlay.
we need to hide the whites from the layer and blend with the underlying layer.
Double click on the layer to get the layer options panel.
The important slider here is Underlying Layer. Drag the white triangles to the left.
Hold Option or Alt Key clicking on the triangles splits them so you can feather the blending effect.
Now select layer 1 (second line art) and change blending to multiply.
Double click on the layer to get the layer options panel.
This time i want to blend blacks to minimize the line art effect.
Hold Option or Alt Key, Drag the black triangles to the right to blend.
Optional step: Add layer mask to background copy 2 and mask eyes and teeth to appear white. Take brush tool and paint with black.
Add vibrance to your liking to make colors pop.
Note: If you want go to blend if and adjust blacks and whites slider to your preference to get desired look.
That’s it. We’re Done.

[sociallocker id=”1411″][download-attachments][/sociallocker]