Add Drama Using Radial Focus Blur Filter in Photoshop

In this Radial Focus Blur photo effects tutorial, we’ll learn how to bring more drama to any image with a simple zoom effect created using Photoshop’s Radial Blur filter.
First open photograph and duplicate it.
click the Quick Mask Mode button in the toolbox. key short cut [Q]
take soft brush tool and paint on subject face to make a selection
Red Color differentiates the protected and unprotected areas. When you leave Quick Mask mode, the unprotected areas become a selection.
Click the Standard Mode button in the toolbox or key shortcut [Q] to turn off the quick mask.
Now we’re ready to apply the Radial Blur filter. Go up to the Filter menu, choose Blur, and then select Radial Blur. This opens the Radial Blur filter’s dialog box.
First, set the Blur Method to Zoom. I want the zoom to be coming from behind the subject, Photoshop doesn’t provide us with a preview for this filter and view the results.
For now, I’ll set my Amount value to 90 and click OK.
Now i want to sharpen image with the High Pass Filter to improve overall focus.
Make a stamp visible copy ctrl + shift + E. and apply high pass filter.
Now that we have the blend mode set to softlight.
Now we Apply special color effects to image using gradient map. Click the Gradient Map icon in the Adjustments panel.
choose from a list of gradient fills, shadows & highlights are mapped to the each endpoint color, and midtones are mapped in between and reduce opacity.
Change the blend mode of the Gradient Map adjustment layer to color.
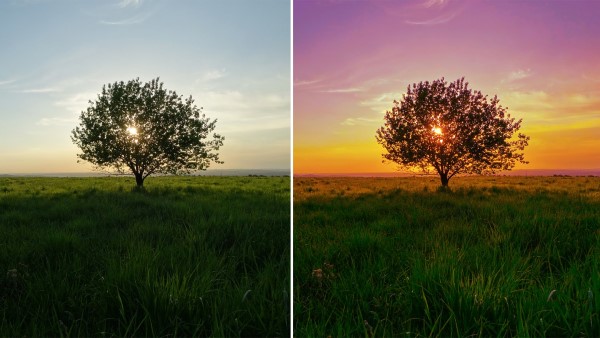
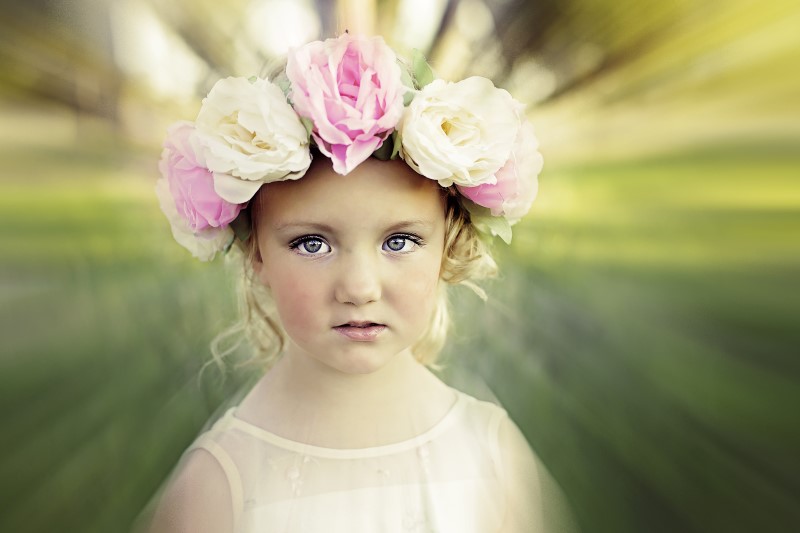
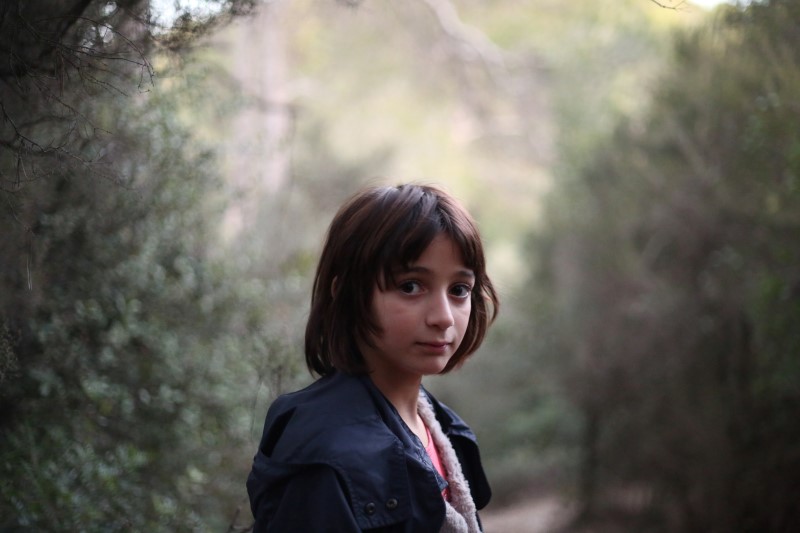
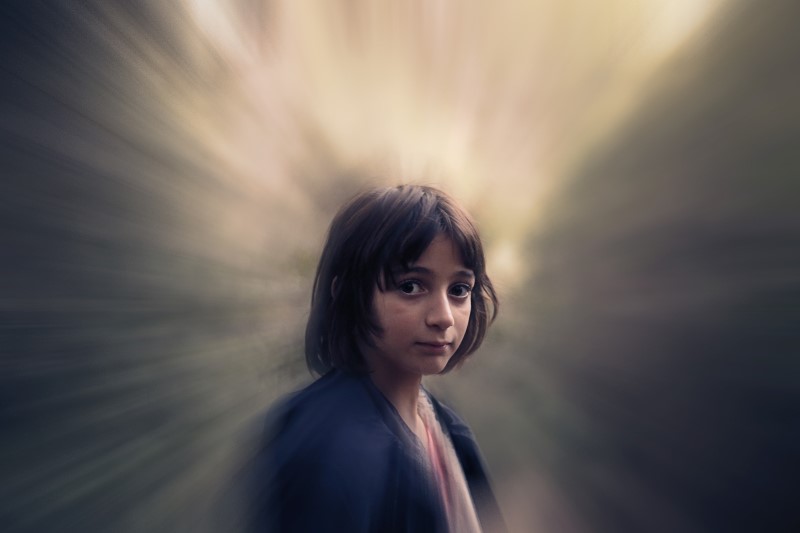
Here is before & after
[sociallocker id=”1411″][download-attachments][/sociallocker]