How to Get Skin Tan and Bronzer in Photoshop with Action

In this photoshop skin retouching tutorial, i will show you how to get fake skin tan in photoshop using levels adjustments.
Skin Tan and Bronzer Effect Photoshop Tutorial :
CLICK HERE TO WATCH TUTORIAL
1
00:00:13
How to get skin tan in Photoshop.
2
00:00:22
Add new levels adjustment layer.
3
00:00:32
Modify individual channels to get rosy tones.
4
00:01:18
reduce opacity to 30%.
5
00:01:31
Now darken skin tones.
6
00:01:38
add new levels adjustment again.
7
00:01:51
change layer blending to multiply.
8
00:02:09
now make a warm bronze tones.
9
00:02:16
Again add levels adjustment.
10
00:02:29
Modify individual channels to get skin bronzer tones.
11
00:03:21
Reduce layer opacity to 60%.
12
00:03:33
Group all layers.
13
00:03:54
Add inverted layer mask to the group.
14
00:04:00
press-and-hold Alt (Mac: Option), then click the layer mask thumbnail.
15
00:04:13
Now take soft white brush and paint on skin.
16
00:04:55
lower brush opacity to softly bronze skin… if needed.
17
00:05:17
reduce the intensity of the effect by adjusting opacity of the group.
18
00:06:02
That’s it. We’re done.
19
00:06:15
PSDESIRE created skin tanner photoshop action.
20
00:06:23
Download action from my website and simply click on play button.
21
00:06:36
Use a soft white brush at a low opacity to softly bronze skin…
22
00:06:40
(don’t over do it) and adjust layer opacities if needed.
23
00:07:29
With just one-click you can add the effect to photos.
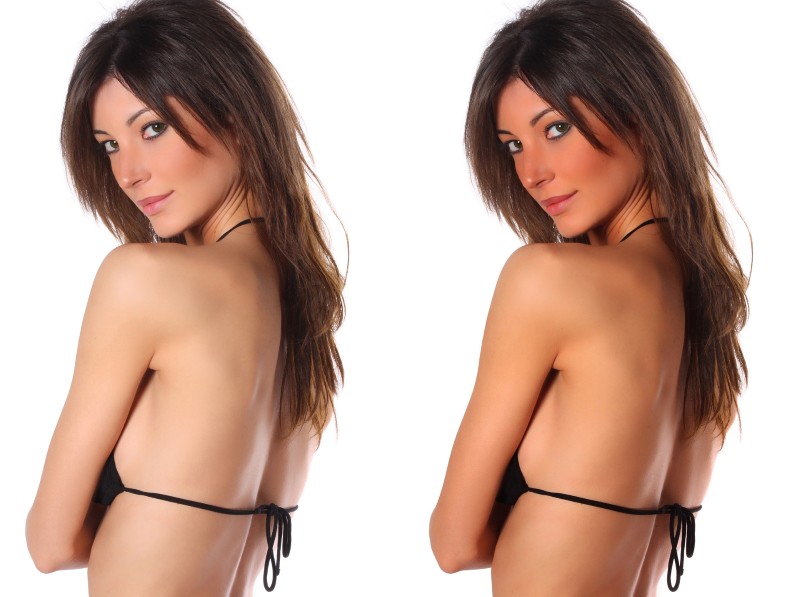
How to Get Skin Tan and Bronzer in Photoshop (before and after)
[sociallocker id=”1411″][download-attachments][/sociallocker]