HDR Photography with Combine Multiple Exposures in Photoshop

In this photo editing tutorial, we show you how to convert normal photograph into awesome HDR image for artistic effects look. Just in case you’re unfamiliar with the term HDR. HDR stands for High Dynamic Range Imaging. A regular photo can’t capture the full range of lights and shadows that the human eye can see. There are HDR function option for most of DSLR’s but we don’t have much adjustments to do in camera. Each time you take a photo, the camera takes two shots at different exposures and combines them to preserve details in shadows and highlights in high-contrast scenes.
In general, don’t use your camera’s auto-bracket feature, because the exposure changes are usually too small. So u can put the camera on a tripod and take eight shots, from under- to over-exposed, one f-stop apart each. or take a straight JPEG or RAW photo and we expose it manually in photoshop.
in this case i just took single JPEG shot with correct exposure and now open photograph in photoshop. i’m using photoshop cs5 version for this tutorial.
goto adjustments and select exposure adjust from under- to over-exposed, one f-stop apart each. i will keep exposure value from -4 to +4 and save photos.
The exposure differences between the photos should be one or two EV (exposure value) steps apart.
you can use DSLR to do the same as well. You can try taking at least five to seven photos, but you might need to take more exposures depending on the dynamic range of the scene.
The minimum number of photos should be three.
When you have the exposures from which you want to create your HDR image, you need to put them together using the Merge to HDR Pro feature in Photoshop.
Now goto File –> Automate –> Merge to HDR
click Browse to select specific images.
click ok.
after loading files, manually set EV dialog box appears. select EV radio button if you created multiple exposure images using photoshop or if u captured through DSLR then keep it default to gather metadata automatically.
here EV means exposure value, give exact same amount of exposure value of the respective images and click ok.
When the calculations are done, the Merge to HDR Pro window opens.
Each of the images in the merge is shown as a thumbnail below the preview.
You can deselect each image to see what impact it has on the combined exposure.
By default, Merge to HDR Pro assumes that you want control over the image right away and sets the Mode menu to 16-bit color and Local Adaptation.
To adjust the tonal range, The Detail slider sharpens the smallest bits in the image.
Use the Radius and Strength sliders in combination to increase the perceived sharpness of the image.
depending on the photograph scene you then have a few more options to use as well, including the Curve panel.
when you’re happy with the result click ok.
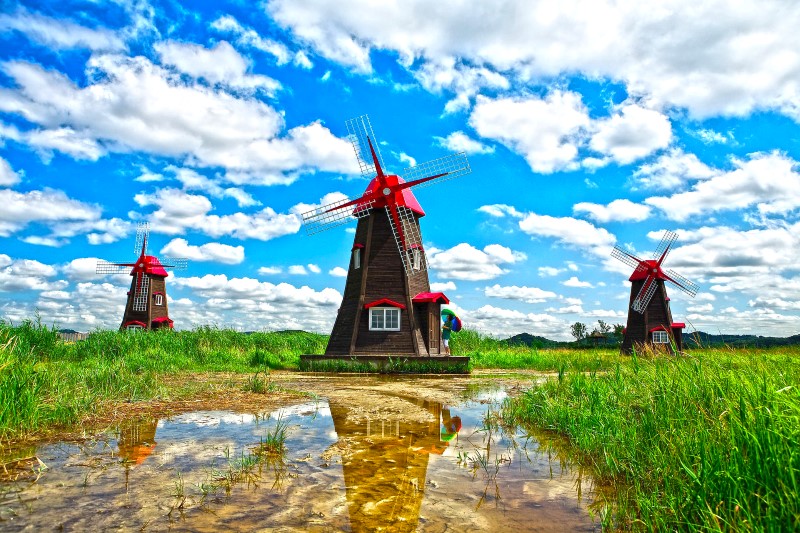
Here is before and after results. If you have only single photograph then try this method to create awesome HDR photography.

[sociallocker id=”1411″][download-attachments][/sociallocker]