How to Smooth & Soften Skin Retouching Easily in Photoshop

In this tutorial, we’ll learn how to smooth and soften skin retouching in Photoshop without blurring out important image details, like the person’s eyes and mouth, and while keeping as much good skin texture as we can.
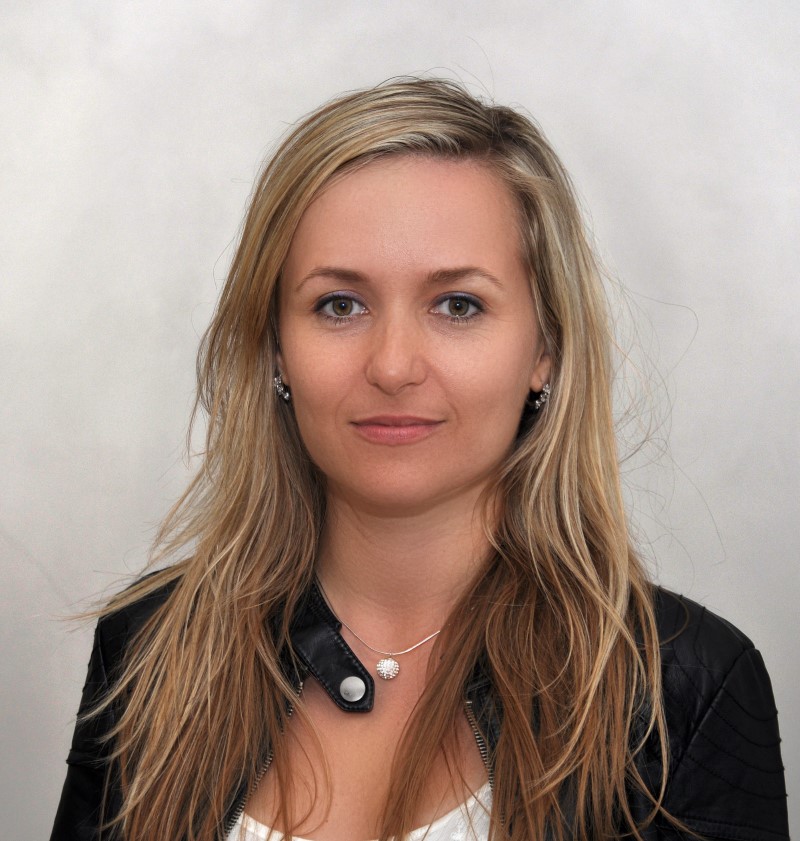
To follow along, you can use any portrait photo. Before we soften the skin, we should first remove any
unwanted blemishes.
first duplicate background image. let’s name the layer “Spots Remove”.
Next, choose the Spot Healing Brush Tool from the Tools panel. Set The Spot Healing Brush To “Content-Aware” and
change mode to lighten.
To remove any unwanted skin blemishes, all we need to do is click on them with the Spot Healing Brush.
Photoshop will instantly replace the problem texture with good texture from the surrounding area.
Now that we’ve removed any blemishes, we’re ready to smooth and soften the skin.
Just like we did with the Spot removal, we’ll do the work on its own separate layer.
Duplicate spots remove layer & name the layer “Soft Skin”, then click OK.
To soften the skin, we’ll use Photoshop’s High Pass filter. Go up to the Filter menu, choose Other and then choose High Pass.
For a typical portrait shot, a Radius value of around 24 pixels works well.
Next, we’ll add some blurring to our High Pass filter effect using Photoshop’s Gaussian Blur filter.
for the Gaussian Blur filter, I’ll enter one third of high pass radius amount which is 8 pixels.
The High Pass effect now looks softer and less detailed Change The Layer Blend Mode To Linear Light.
for softening, we need to invert the Soften Skin layer. To do that, go to Image menu, choose Adjustments, and then choose Invert.
With the layer inverted, the image goes from being over-sharpened to looking like a weird, blurry mess with big ugly halos around everything.
To reduce the halo effect, click on the small menu icon in the upper right corner of the Layers panel.
Choose Blending Options from the menu that appears You’ll find the sliders below one for controlling the darker areas of the image on the left and one for the lighter areas on the right.
By splitting the sliders apart, the space between the two halves creates a much smoother and more precise blend.
Drag the left half of the slider to the right and similarly Drag the right half of the slider to the left.
At this point, we’ve softened the skin, but we’ve also softened the eyes, mouth, hair, and everything else in the image.
We need a way to hide the effect everywhere except the skin, and we can do that using a layer mask.
Press and hold the Alt key and click the Add Layer Mask icon at the bottom of the Layers panel.
Select The Brush Tool, Set Your Foreground Color To White & Paint Over The Skin
If you want to see exactly where you’ve painted, you can view the layer mask itself in the document by pressing and holding your Alt key and clicking on the mask thumbnail in the Layers panel.
Here is the final result. That’s how to remove unwanted blemishes, and then how to smooth and soften skin, in Photoshop!

[sociallocker id=”1411″][download-attachments][/sociallocker]