How To Turn Photos into Fake Blueprint Effect in Photoshop

In today’s tutorial I’m going to take you through the process of creating a blueprint effect in Adobe Photoshop. We’ll use some built in Photoshop filters to produce the basic outlines from a source photograph, then mix in some grid patterns and textures to enhance the realism.
First goto adjustments panel and select solid color. choose a dark blue color.
In order to add a grid to the blueprint, we first need to make a pattern swatch.
Create a new document at around 80x80px in size. This size may vary depending on the scale of your document.
Take rectangular shape tool and draw a vertical line. Duplicate the shape and move it to other end of the
document. Similarly add lines at top and bottom as it looks like a thick outline border.
Then go to Edit > Define Pattern. Give it a descriptive name such as Blueprint Grid Pattern.
Close the document and return to the blueprint effect. Create a new blank layer and Fill it with black.
scale down the layer by 25%. Double click the layer to open layer style dialog and add a pattern overlay.
then choose the newly created outlined boxed grid pattern. Reduce the pattern scale and also opacity.
Again open layer style dialog and this time add stroke. Change the blending mode of the grid layer to Screen.
The realism of this blueprint effect tutorial all depends on the base photograph we have to work with.
Duplicate the base image and drag it above all layers. Go to Image > Adjustments > Desaturate to remove the
colour from the image, making it black and white.
Then go to Filter > Stylize > Find Edges to generate the basic outlined look that forms the blueprint effect.
Blueprints are mostly recognised as a light coloured drawing against a dark blue background, so go to Image > Adjustments > Invert to switch the colours around.
Change the blending mode of the image layer to Screen to render the black background transparent, leaving just the white outline against the blue background.
Now select transform tool and scale down the blueprint design layer.
I want to finish the effect off with a dirty paper texture, we can get one of these type of royalty-free paper textures from google search. Drag it into the document & place where u will find it looks good, Change the blending mode to Screen to allow the grungy paper texture. double click on the layer to get the layer options panel.
we want to preserve the highlights so drag the black triangles to the right.
Hold Option or Alt Key clicking on the triangles splits them to feather the blend.
all layers and effects are editable so we can adjust any layer any time.
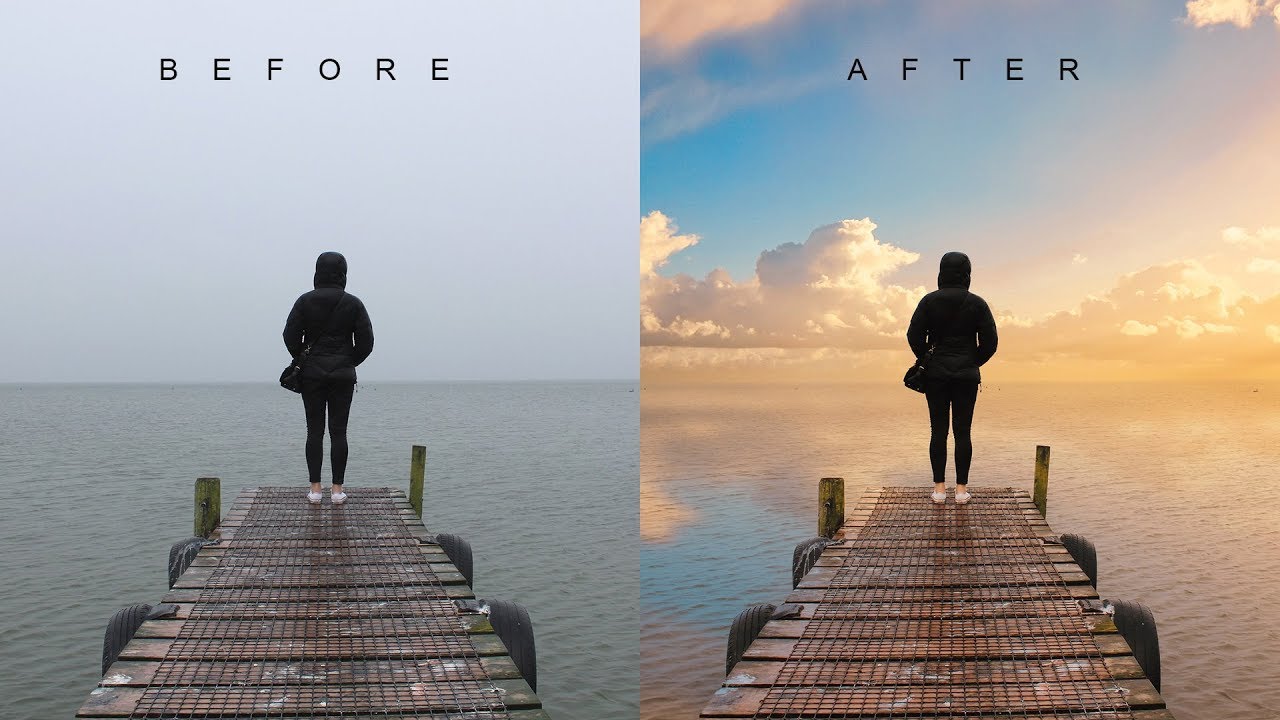
Here is before and after
The final result is a great looking blueprint effect with a hand drawn appearance, along with a subtle grid pattern, creases, stains and folds that add to the realism.
[sociallocker id=”1411″][download-attachments][/sociallocker]