How to Create Glitch Distortion Photo Effect in Photoshop
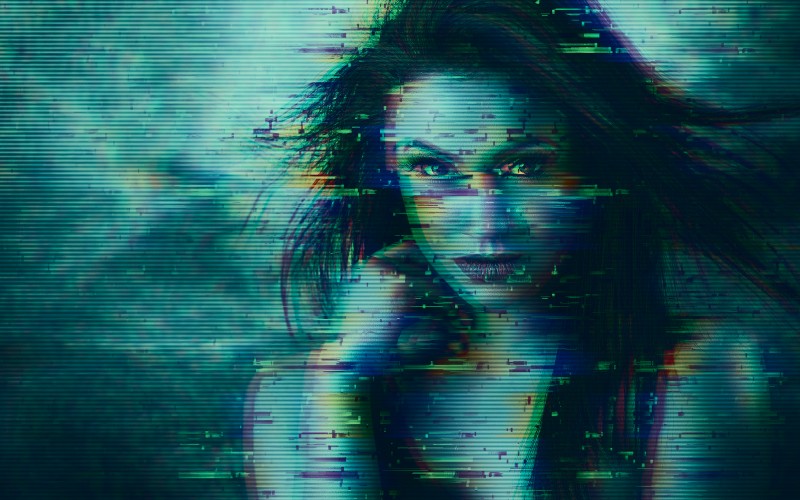
In this photoshop photo effects tutorial, I’ll show you how to create non-destructive glitch distortion dispersion effect in photoshop.
Glitch Distortion Photo Effect Tutorial :
CLICK HERE TO WATCH TUTORIAL
Open the image you want to edit in Photoshop. Then go to edit menu – open preset manager. select patterns from the Preset Type drop-down menu. Now download glitch patterns from attachment below of this post. Then click the Load button and navigate to the location on your computer where pattern are saved. Click done to save the files.
Add new blank layer. Rename the layer to glitch distort or displace. Then go to edit and fill the layer with custom pattern. Select the first glitch pattern that we saved earlier. Click Ok to apply.
Next step, duplicate background layer and Rename the layer to “GLITCH 1”. Move the layer to top. Convert layer to smart object to keep it non-destructive. Right click on the layer and create clipping mask, so any adjustments that we add to the layer affects only the below layer.
Now go to filter menu – choose distort and select wave filter. (There is no exact settings to this, just adjust sliders randomly and keep an eye on the preview image). Keep wave type: square. No. of generation: 3, Set Wavelength minimum: 9 and maximum: 899, Amplitude minimum: 213 and maximum: 479. Scale horizontal: 19 and vertical: 2. Keep undefined areas: repeat edge pixels. Click Ok.
Next step, duplicate background layer again and Rename the layer to “GLITCH 2”. Move the layer to top. Convert layer to smart object. Now change the layer tone to red, Open the Layer blending Style options, uncheck both the Green and Blue channels. Click ok to apply changes.
Now open filter menu – choose distort and select wave filter again. Keep wave type: square. No. of generation: 4, Wavelength minimum: 817 and maximum: 841, Amplitude minimum: 1 and maximum: 60. Scale horizontal: 22 and vertical: 2. Keep undefined areas: repeat edge pixels. Click Ok.
Next step, duplicate background layer again and Rename the layer to “GLITCH 3”. Move the layer to top. Convert layer to smart object. Now we need to convert this layer into blue tone., Open the Layer blending Style options, uncheck both the Red and Green channels. Click ok to apply changes.
Go to filter menu – choose distort and apply wave filter again. Keep wave type: square. No. of generation: 3, Wavelength minimum: 39 and maximum: 984, Amplitude minimum: 1 and maximum: 117. Scale horizontal: 31 and vertical: 3. Keep undefined areas: repeat edge pixels. Click Ok.
Now add some motion blur to the layer. Go to blur menu – select motion blur. Keep angle: 0 and distance: 93 pixels. Click ok.
Now let’s add screen flickering and glitchy horizontal lines that appear near the top of the monitor.
Add new blank layer. Rename the layer to horizontal lines. Then go to edit and fill the layer with custom pattern. Select the second glitch pattern that we saved at the starting of the tutorial. Click Ok to apply. Change layer blending to overlay and lower the opacity to 50%.
Now add center light to the effect. Go to adjustments and add gradient fill adjustment. Select black to transparent gradient preset. Change starting color of the gradient, click the left color stop and Change its color to dark grey. Similarly change end color of the gradient to white. Change gradient fill style to radial. Check reverse option to keep the light at center. Set angle between 30-40 degree. Click Ok.
Change layer blending to overlay. Rename Gradient fill layer to Lighting.
To change the position of the lighting. Double Click on the gradient fill to open, drag and place light to your preference.
Finally apply color lookup adjustment to color tone the image. Select horror blue look to give scary kind of effect.
If you want intense horror or scary type of movie poster. Then add hue/saturation adjustment to GLITCH 1 and set saturation to -100. similarly de-saturate the GLITCH 2 and 3 layers .
That’s it we’re done. Here is Before and After.
[sociallocker id=”1411″][download-attachments][/sociallocker]


