Hard Poly Photo Effect Photoshop Tutorial

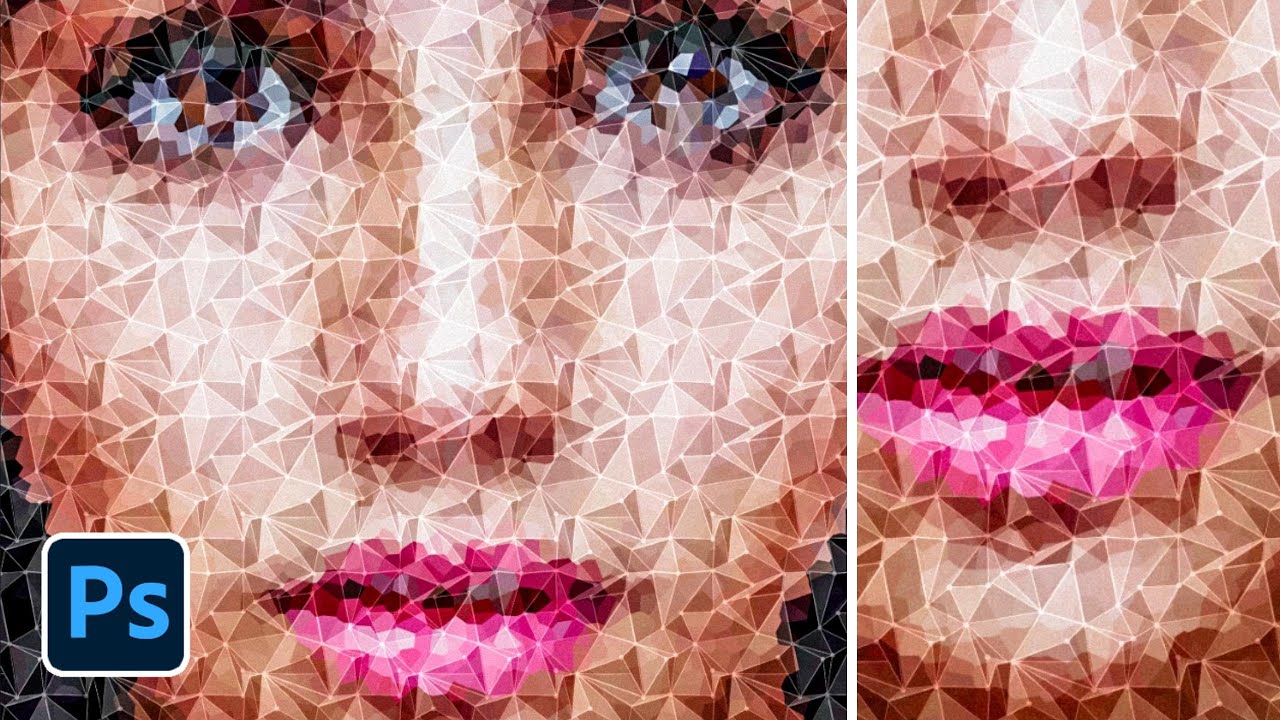
Today, let’s learn how to create a hard poly photo effect in Photoshop. It’s an excellent technique for giving photos a unique and artistic look. Ready? Let’s dive in!
Hard Poly Photo Effect : Photoshop Tutorial
Watch YouTube Video: https://youtu.be/3VJwpqM5iZw
Open your desired photo in Photoshop—portraits work best. Duplicate the layer with CTRL+J, then convert it to a smart object.
Navigate to Filter -> Pixelate -> Crystallize and set the cell size to 30. Now download and install my poly effect patterns from the link below. These include “low poly” and “poly lines with dots” patterns, crucial for our effect.
Double-click the patterns file to install, then double-click the layer to open layer styles. Choose ‘Pattern Overlay’ and select ‘Low Poly.’ Adjust opacity and scale to fit your image.
Convert the layer to a smart object and duplicate it with CTRL+J. Set the new layer’s blending mode to ‘Hard Light.’ Double-click, choose ‘Pattern Overlay,’ and select ‘Poly Lines and Dots.’ Adjust opacity and scale, ensuring the pattern size matches the first one.
Now, let’s enhance contrast and color balance. Go to ‘Levels’ adjustment in the adjustments panel. Adjust the sliders for shadows, mid tones, and highlights to add depth.
Move on to ‘Curves’ adjustment for precise control over tonal range. Add points and adjust them to fine-tune contrast and color balance. Remember, there’s no right or wrong—adjust to your liking.
For the final touch, add a Color Lookup adjustment layer and select ‘Filmstock.’ Change its blending mode to ‘Soft Light.’ Experiment with other options to find the best fit.
That’s it! A simple yet effective way to transform your images with a hard poly photo effect using Photoshop. Try it out and unleash your creativity!
If you found this tutorial helpful, don’t forget to subscribe, give it a thumbs up, and share your thoughts in the comments. Stay tuned for more content and happy editing!


