Manual Exposure Stacking: Create Vibrant Photos in Photoshop
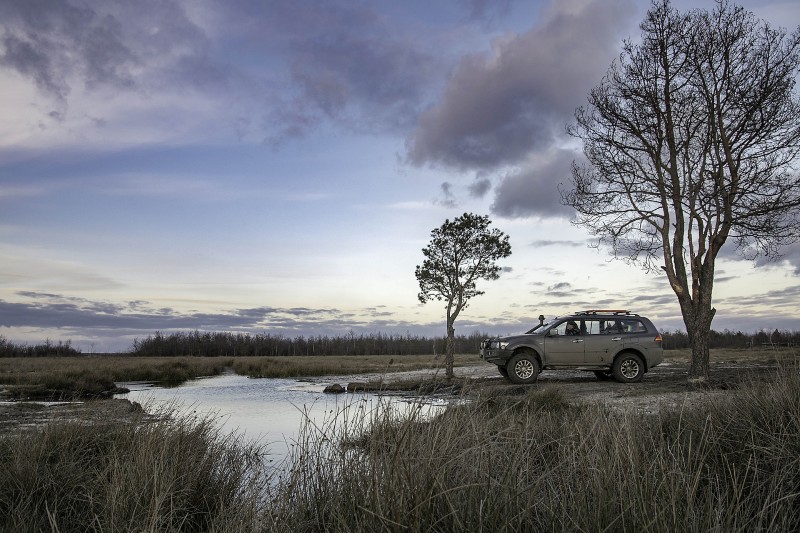
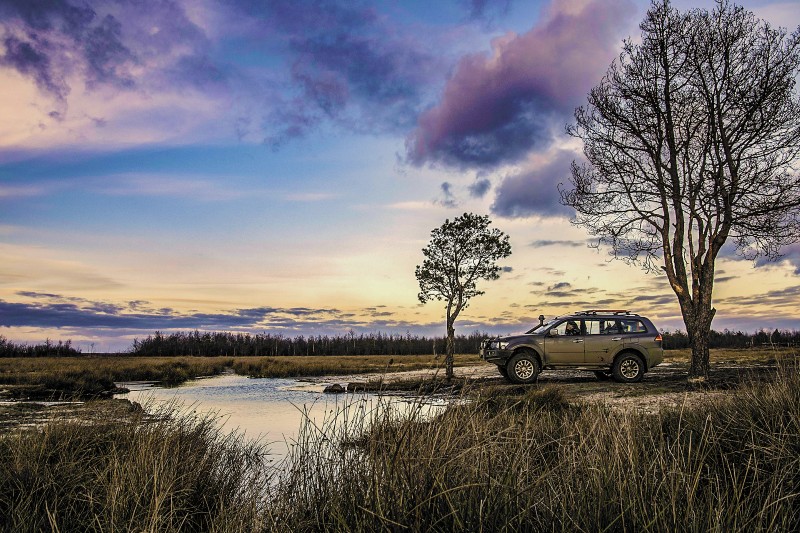
In this photoshop manipulation tutorial, learn how to create manual exposure stacking and blend them to make natural dynamic HDR images in photoshop.
Manual Exposure Stacking Photoshop Tutorial :
CLICK HERE TO WATCH TUTORIAL
How to create dramatic landscapes with blending exposure technique in photoshop.
Open your image and duplicate 3 times.
Select first duplicate copy and covert to smart object.
Rename the layer to “UNDEREXPOSE”.
Open current layer in Camera Raw Filter.
Now we need to under expose the image to get highlights information.
To do that, lower the blacks, whites, shadows and highlights sliders to extreme left end.
Increase clarity slider to get details.
Click ok to apply changes.
Select second duplicate layer and convert to smart object.
Rename layer to “NORMAL”.
Open “NORMAL” layer in camera raw.
Keep everything at zero and increase clarity.
Click Ok to apply changes.
Select third duplicate layer and convert to smart object.
Change name to “OVEREXPOSE”.
Again open in Camera Raw Filter.
Now we need to over expose the image to get shadows information.
To do that, increase the blacks, whites, shadows and highlights sliders to extreme right end.
Increase clarity slider to enhance details.
Click OK to apply changes.
Now we need to blend these “Under Expose, Normal & Over Expose layers” to get natural high dynamic image.
Select all 3 layers and convert to smart object.
Choose Layer – Smart Objects – Stack Mode and select a MEAN from the sub-menu.
Mean command reads each pixel’s value from every layer and computes the average.
Now add vibrance to pop colors and change blending mode to color.
Finally add color lookup adjustment to color tone or grade the image.
I want to give some warm look, You may apply different colors to your liking.
That’s it.
[sociallocker id=”1411″][download-attachments][/sociallocker]


