How to Transform Photos to Pencil Sketch Effect in Photoshop
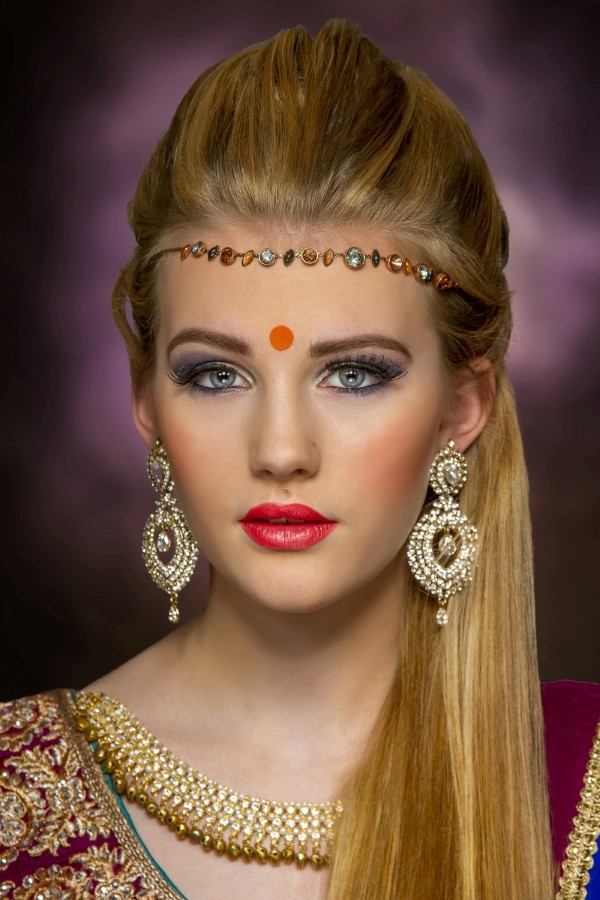
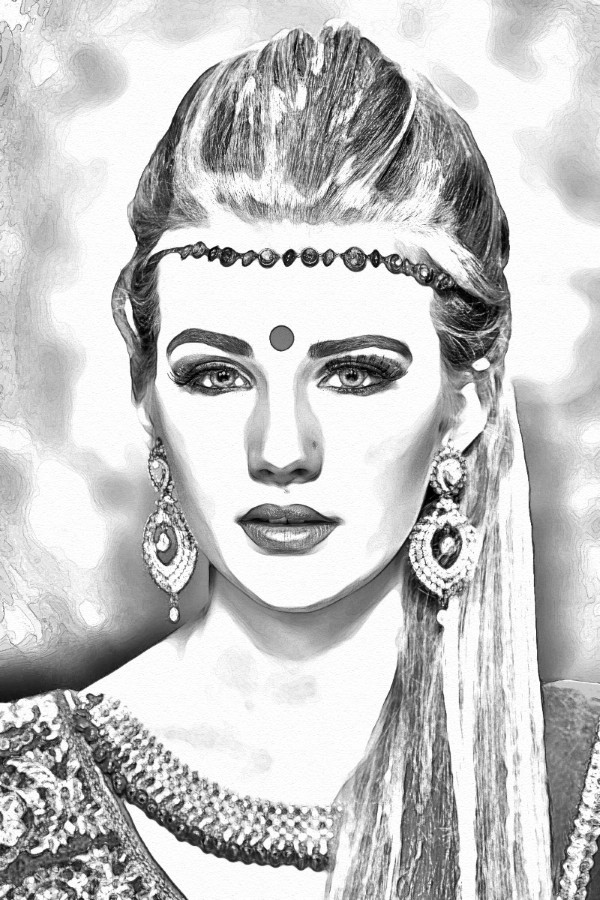
In this photoshop photo effects tutorial, learn how to convert your photos into pencil sketch effect in photoshop easily and quickly.
Pencil Sketch Effect Photoshop Tutorial :
CLICK HERE TO WATCH TUTORIAL
1
00:00:14
How to create artistic sketch effect (pop up art) in photoshop.
2
00:00:29
First duplicate background layer.
3
00:00:43
Invert the layer (CTRL+I).
4
00:00:53
Convert layer to smart object.
5
00:01:03
Change layer blending mode to color dodge.
6
00:01:14
Now go to filter tab – select gaussian blur.
7
00:01:22
Add radius of 50 pixels, change it to your preference if necessary.
8
00:01:37
Change layer name to “SKETCH”.
9
00:01:49
Adjust contrast using levels or curves adjustment.
10
00:02:16
Add black & white adjustment layer to desaturate the image.
11
00:02:33
create a new layer from all the visible layers by pressing Ctrl + Shift + Alt + E.
12
00:02:44
Go to filter gallery – select glowing edges.
13
00:03:05
Keep edge width:1, Brightness:20 and smoothness:15.
14
00:03:20
Invert the current layer (CTRL+I).
15
00:03:31
Change layer name to “DETAILS”.
16
00:03:40
Change layer blending to multiply.
17
00:04:06
lower the opacity to your preference.
18
00:04:17
Now add paper texture using texturizer filter.
19
00:04:23
Create a new blank layer and fill it with white.
20
00:04:42
Go to filter gallery and select Texturizer.
21
00:04:50
Keep Texture Type:Sandstone, Scaling:100, Relief:4 and Light Direction:top.
22
00:05:14
Change layer blending to multiply.
23
00:05:26
Lower the opacity to your preference.
24
00:05:35
Change layer name to “Paper Texture”.
25
00:05:52
If you want colored effect, simply hide the black and white adjustment layer.
26
00:06:04
(Optional) You can add hue/saturation adjustment to change colors.
27
00:06:19
Finally group all layer and change name to Pencil Sketch Effect.
28
00:06:27
That’s it.
[sociallocker id=”1411″][download-attachments][/sociallocker]


