Powerful Black & White Conversion Technique in Photoshop

In this Photoshop photo Effects Tutorial, learn how to use image calculations tool to convert your photos into beautiful dramatic and stunning black & white conversion images.
Black & White Conversion Tutorial :
CLICK HERE TO WATCH TUTORIAL
Step: 1) Applying Calculations:
First go to image menu, choose calculations. Calculations tool dialog box pops up. You may notice that the source 1 and source 2 have the same settings. And all we have to do simply change the channels of source 1 and source 2.
Try to find the right combination between channels. For example if you select red channel for source 1 then find the right looking channel for source 2. It depands on your personal liking & preference.
In my case, i find blue channel for source 1 and green channel for source 2 seems better combination.
Keep blending to multiply. Opacity to 100%. And select result to new document. Then click ok.
The resulted alpha black and white layer created in a new document. Now go back to original document. Again open image menu and select calculations. Keep the same previously applied settings, but this time change blending to lighten. Choose new document as result and click ok. Now we have 2 alpha documents.
Step: 2) Blending Alpha Documents:
Select the first document ctrl+A and copy it ctrl+c and paste it into original document ctrl+v. Now select the second document and copy it and past it.
Right click on layer 2, go to blending options. Now select blend if tool. Set default to grey, which mean we can blend blacks and whites. I want to blend the blacks, so hold alt key and drag the slider towards right. Do the same with the underlying layer as well. Click ok to apply the changes.
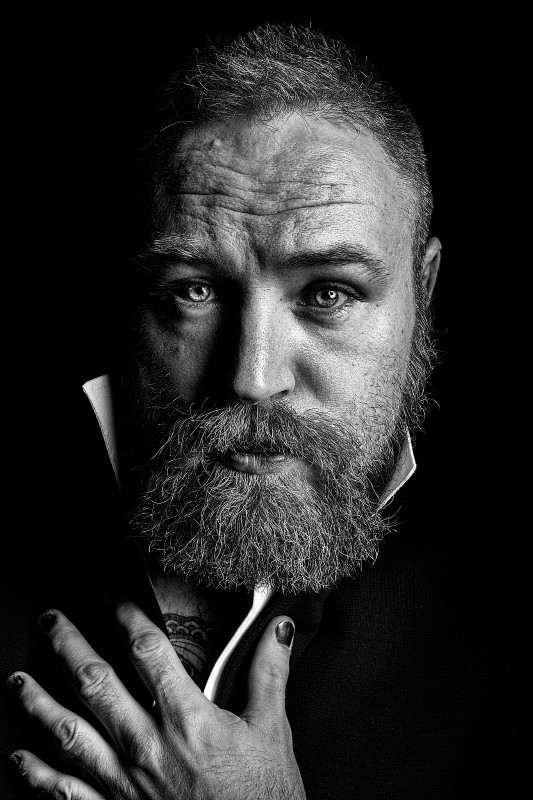
Step: 3) Retouching Eyes:
Now i want to enhance and brighten his eyes retouch. To do that create a new blank layer. Shift+ctrl+N keyboard shortcut. Take a soft brush, select white foreground color. I suggest you to Zoom in a lot and paint on the eyes.
Change its blending to overlay.
Step: 4) Sharpen Details:
Now lets sharpen overall details. Duplicate background layer and move the layer to top above all layers.
Go to filter menu, other and select high pass. Add very small radius around 1 or 2px to get fine details. Click ok.
Change high pass layer blending to linear light.
Desaturate high pass layer to remove any visible colors. Go to image menu, adjustments and select desaturate Shift+Ctrl+U
Step: 5) Final Touch-ups:
Image looks good enough. If you want boost mid-tones and add matte faded look using curves adjustment.
Move the end of curve little higher to add popular fade and to mute the blacks.
Drag the curve up little bit to bring exposure up.
That’s it. We’re done.

[sociallocker id=”1411″][download-attachments][/sociallocker]