Blur Backgrounds In Photoshop – Portrait Photography

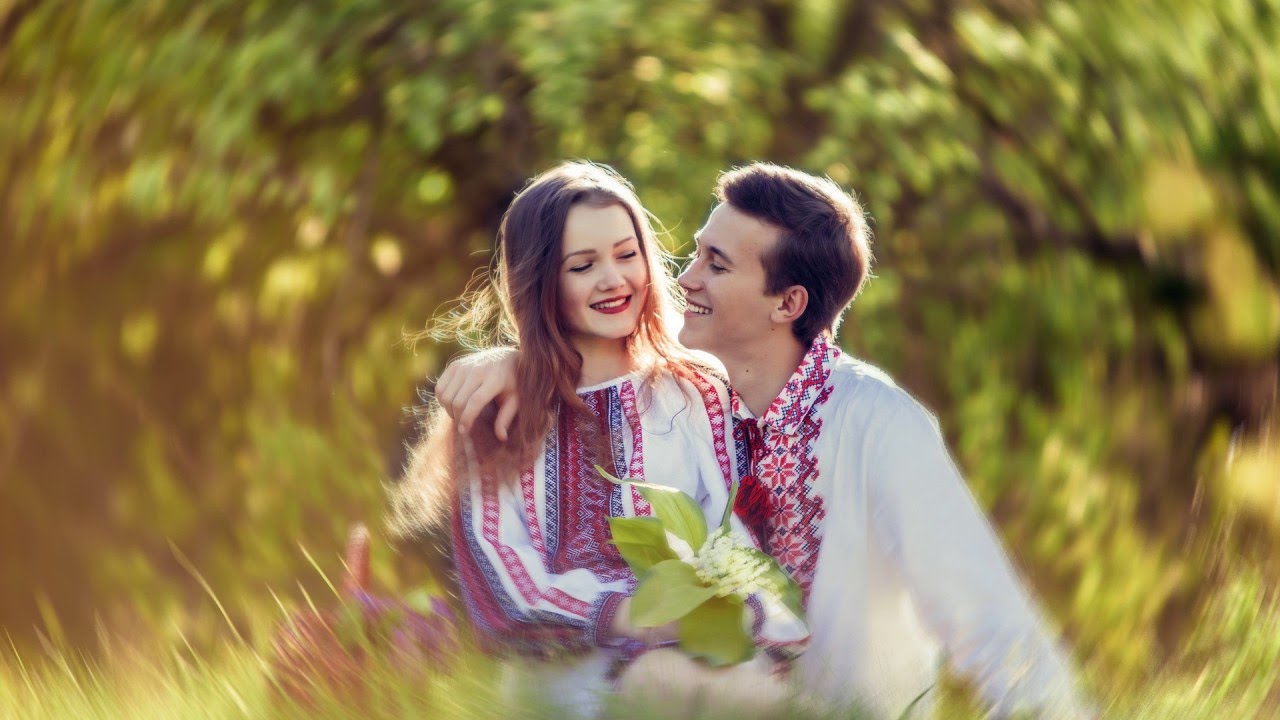
Learn how to blur backgrounds in Photoshop in just a few steps. Photoshop is a powerful image editing software that allows you to manipulate images in countless ways. One of the many features it offers is the ability to blur the background of an image. This technique is often used to draw attention to the main subject of the image, making it stand out from the distracting background. Here is a step-by-step guide on how to blur the background in Photoshop, with a few quick tips to help you along the way.
Blur Backgrounds in Photoshop Tutorial:
Duplicate the Background: Press CTRL + J or CMD + J on your keyboard to duplicate the background layer. Rename the new layer to “background”.
Select the Subject: Go to the ‘Select’ menu, then scroll down to ‘Subject’. This tool will automatically select the subject of the image, which will make it easier for you to blur the background.
Duplicate the Subject: Press CTRL + J or CMD + J again to duplicate the subject layer. Rename the new layer to “subject”.
Load the Layer as a Selection: Hold down the CTRL key and click on the “subject” layer thumbnail to load the layer as a selection.
Expand the Selection: Go to the ‘Select’ menu, then scroll down to ‘Modify’ and over to ‘Expand’. Expand the selection by 10 pixels, then hit ‘OK’.
Fill the Background: Go to the ‘Edit’ menu, then scroll down to ‘Fill’ and choose ‘Content-Aware’. This will fill the background with pixels that blend seamlessly with the surrounding area.
Deselect: Press CTRL + D or CMD + D on your keyboard to deselect the selection.
Convert to a Smart Object: Convert the “background” layer to a smart object by right-clicking on the layer and selecting “Convert to Smart Object”.
Apply the Tilt Shift Filter: Go to the ‘Filter’ menu, then scroll down to ‘Blur Gallery’ and over to ‘Tilt Shift’. This filter will allow you to blur the background in a way that makes it appear as if it’s out of focus.
Drag the Overlay: Drag the overlay to the floor to apply the tilt shift effect to the bottom of the image.
Increase the Blur: Increase the blur by adjusting the slider, then click ‘OK’.Blurring the Background in Photo Editing
In photo editing, blurring the background is a popular technique used to focus attention on the subject of the image. After blurring the background, it is essential to group both layers and clean the improper edges. This ensures that the final result is clean and sharp.
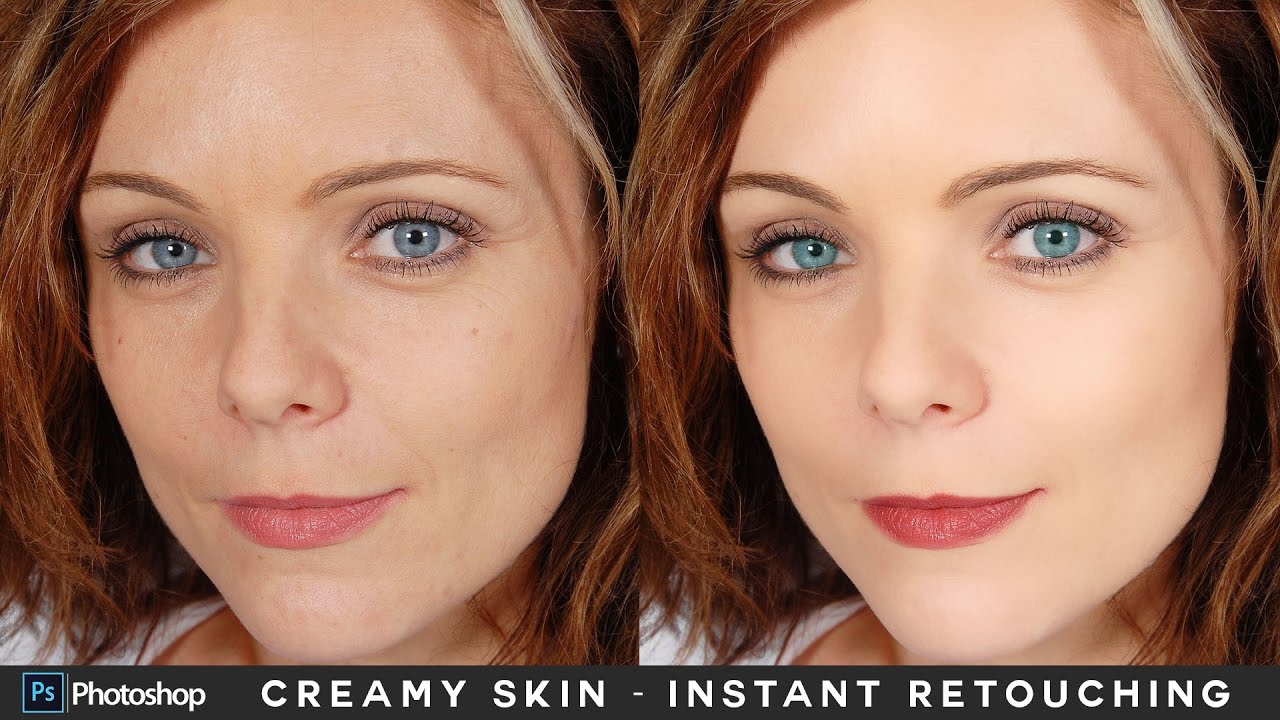
Sometimes while making subject selection, you may miss adding shadows to the image. To fix this, you can add shadows by adding a layer mask to the group. To do this, simply take a brush and select black as the foreground color. Then, paint on areas where you do not require the shadows to be. This will add a more realistic and natural look to your image.
The final step in this photo editing process is to add global color adjustments. In this example, a sunset effect is added to the background. To do this, go to Adjustments and select Color Lookup. From there, choose the Late Sunset LUT. If you only want the effect to be applied to the highlights of the image, select the layer mask, then go to Image and select Apply Image. Uncheck Invert to apply the colors only to the highlights. This technique is very useful in color grading your photos and can enhance the overall look and feel of the image.
To give the edited photo a film-like look, one more color lookup is added. This time, the Filmstock LUT is selected. The opacity can be lowered as needed to achieve the desired effect. And that’s it! With these simple steps, you can create a professional-looking photo that will grab the attention of your audience.


►Download This Tutorial Photo for Practice: Click Here
►Download PSD file: Click Here
►SUBSCRIBE to my YouTube Channel: CLICK HERE
►JOIN or Become YouTube Member for Direct Downloads: CLICK HERE
►Support Me on Patreon for Instant Downloads: CLICK HERE