How to Create Starry Night Sky Effect in Photoshop
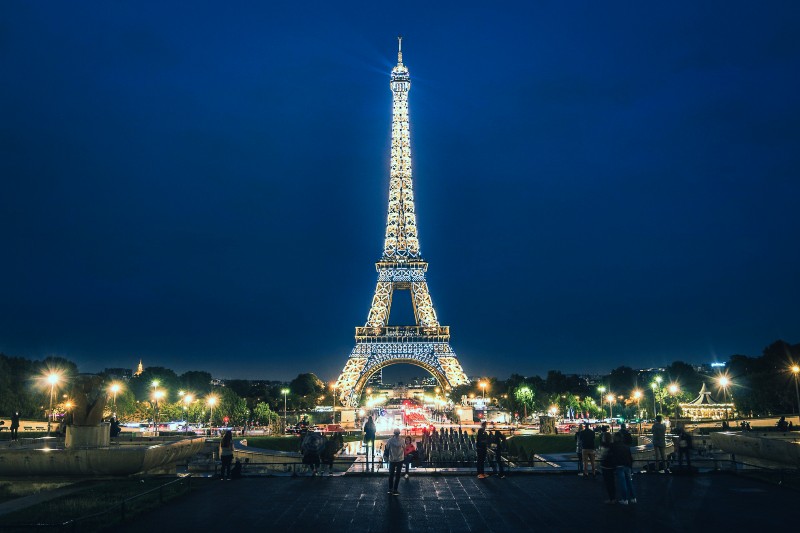
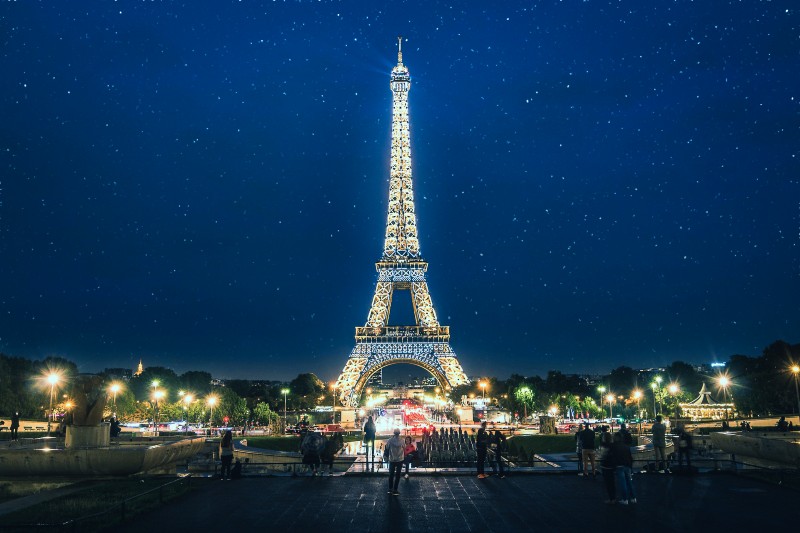
In this Photoshop Starry Night Sky Effect tutorial, we’ll learn how to easily add a star filled sky, to a night time photo. Capturing a night sky with stars with our cameras can be tricky. Brighter light sources nearby, like city lights, results night sky filled with nothing but darkness. Fortunately, as we’ll see in this tutorial, Photoshop makes it easy to add stars into our photos, considering that this technique is often used to create star filled backgrounds for movies, the effect is more than realistic enough, to fool pretty much everyone else.
Starry Night Sky Effect Tutorial :
Let’s get started!
Let’s add a new blank layer for our stars. Click on the New Layer icon at the bottom of the Layers panel.We need to fill our new layer with black. For that we’ll use Photoshop’s Fill command. Go up to the Edit menu and choose Fill.
Convert The Layer Into A Smart Object. That way our filters will be applied as Smart Filters, allowing us to go back and edit their settings later if we need to.
We’re ready to add filters and we’ll start with the Add Noise filter. Enter a value of around 25%. . set the Distribution option to Gaussian and select the Monochromatic option. Click OK to close out of the Add Noise dialog box. Photoshop fills the layer with noise.
We need to add a bit of blurring to it, which will make those single-pixel dots a bit wider and clump some of them together. Go back up to the Filter menu, choose Blur, then choose Gaussian Blur. Generally, a Radius value of 2 to 6 pixels works best, with 2 pixels being ideal for small images and 6 pixels for very large images. Click OK to apply the blurring effect to the noise.
Next, we need to brighten the lightest areas of our noise layer and darken the darkest areas. This will turn the faint, blurry noise into our stars. Choose a Levels adjustment layer. The controls and options for the Levels adjustment layer appear in the Properties panel. Adjust The White And Black Point Sliders
Here is my stars effect after dragging the black point slider.
Let’s add a bit of color to the stars, and we can do that using a Hue and Saturation adjustment layer. First, select the Colorize option. Then, drag the Hue slider to select whichever color you like for your stars.
Group All Three Layers Above The Background Layer. Name the group “Stars”. Change The Blend Mode Of The Layer Group To Screen, or linear dodge.
we need to select the area where the stars should not be visible. In my case, that would be the city in the bottom of the image. click the Add Layer Mask icon at the bottom of the Layers panel. In the Tool bar, select the Gradient Tool. Choose linear gradient. keep foreground and background colors to default black and white. Click and drag on the layer mask
All layers are editable, it allowing us to go back and edit their settings later if we need to.
Here is my final starry night sky effect. Now we can easily replace the photograph and add stars to other photos as well. Simply drag and drop the new photo into working document. Place it below the “stars” layer group.
And we are done.
[sociallocker id=”1411″][download-attachments][/sociallocker]


