How to Create Low Key Lighting Portrait Effect in Photoshop

In this photoshop photo effects tutorial, learn how to create low key photos in photoshop with the helps of curves adjustment.
Low Key Portrait Effect Photoshop Tutorial :
CLICK HERE TO WATCH TUTORIAL
1
00:00:13
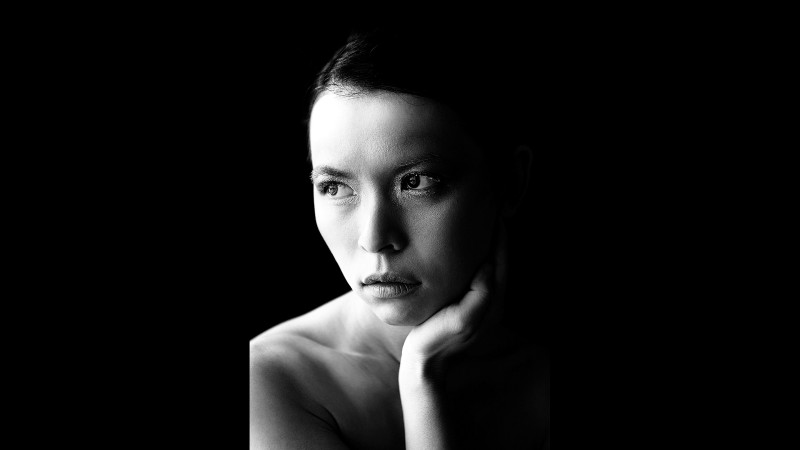
How to create low key photos in photoshop.
2
00:00:25
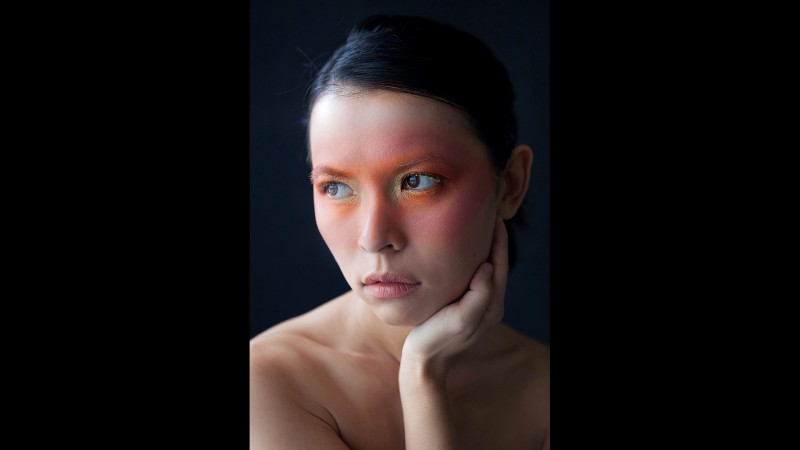
First convert image into black & white.
3
00:00:34
Go to adjustments and select black and white gradient map.
4
00:00:49
Now we need to control highlight and shadows in the image.
5
00:00:58
Add curves adjustment layer.
6
00:01:07
Select On-image adjustment tool.
7
00:01:15
Then click and drag the light areas in the image to adjust.
8
00:01:27
Now select layer mask and add apply image to blend the effect only to lighter parts.
9
00:01:45
Similarly add another curve to make adjustments to the shadows.
10
00:01:56
Select On-image adjustment tool, click & drag the darker areas in the image.
11
00:02:11
Now select layer mask and add apply image to blend the effect only to darker parts.
12
00:02:21
Note: without invert affects lighter areas and with invert affects darker areas in the image.
13
00:02:40
We can change adjustments any time, simply open curves and adjust a tonal area to your preference.
14
00:03:15
Now lower the contrast and higher the brightness slider.
15
00:03:41
Create a stamp visible copy by pressing Ctrl + Shift + Alt + E.
16
00:03:53
Go to filter – apply high pass with radius: 1 pixel.
17
00:04:04
Change blending to linear light to boost the image details.
18
00:04:12
Lower the opacity to your preference.
19
00:04:22
That’s it.
[sociallocker id=”1411″][download-attachments][/sociallocker]