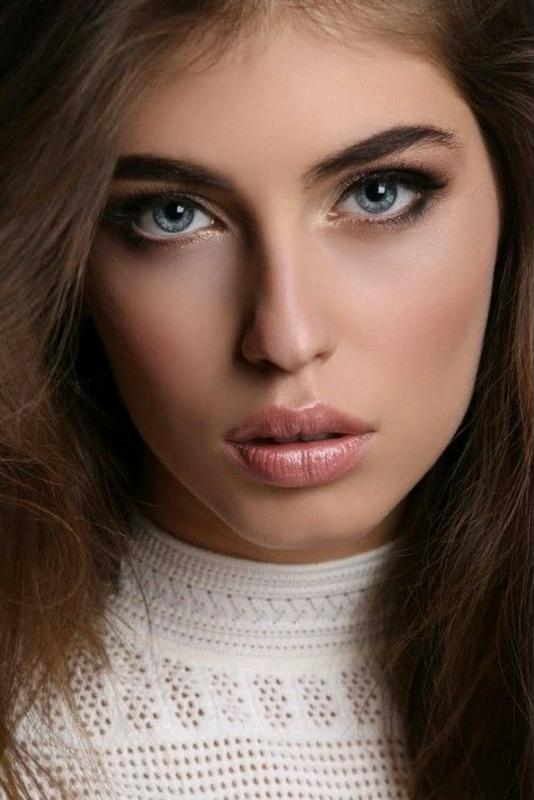
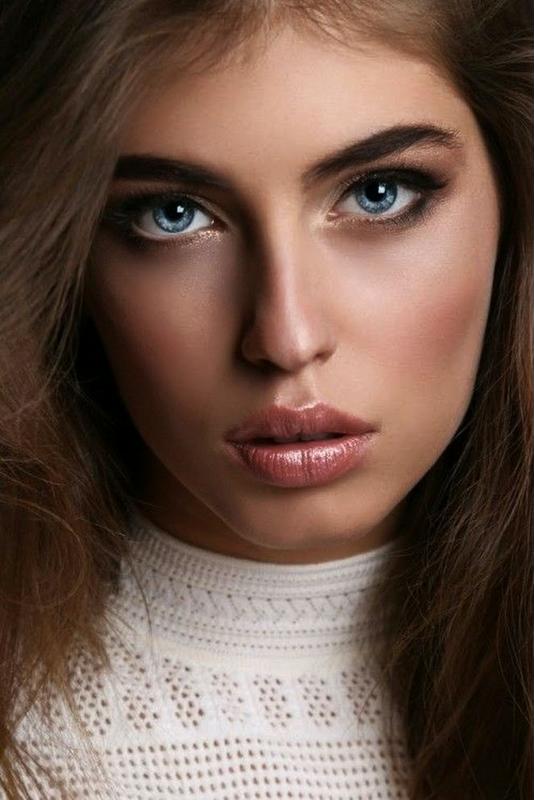
Secret Dodge and Burn Trick using Blending in Photoshop

In this photoshop photo retouching tutorial, learn how to apply dodge and burn to portraits easily in photoshop using blending options.
Dodge and Burn Retouching Tutorial :
CLICK HERE TO WATCH TUTORIAL
Before get into this tutorial. i recommend you to first clear your portrait skin. If any major blemishes appears in the photos first try to clear it and then proceed with the dodging and burning.
Ok let’s start.
First we need to lighten the overall image, to do that go to adjustments and add curves.In here i’m not going to change any thing, instead I’ll change the blending to “screen” which I’m going to use this layer to control dodge effect.
Now we need to darken the overall image, to do that again go to adjustments and add curves. In here i’m not going to change any thing, instead i’ll change the blending to “multiply” which darkens the overall image. I’ll use this layer to control burn effect.
Now select both layers – right click and choose group from layers CTRL+G or Command+G keyboard shortcut and click ok. Now i want to apply the layer mask to the group. to do that simply click on add layer mask icon to apply the layer mask to the group.
Now select layer mask and go to image menu and select apply image. Apply image dialog box appears, in here keep everything to default, except lower the opacity to 50%. click ok.
Now lower the opacity of the group to 50% which controls the dodge and burn strength.
Now we’re going to control the dodge and burn effect. First let’s adjust the dodge effect. Select the dodge layer and right click, select “Blending options”.
In this dialog, the important slider here is Underlying Layer. which contains black triangle and white triangle. White triangle represents the lighter areas whereas black triangle represents the darker areas.
To control the dodge effect we need to minimize the lighten affect from the shadows. So simply drag the black triangles to the right, i will keep blending at 130. Keep an eye on the image so that you will see that the particular lighten areas are selected. Now Hold Option or Alt Key click on the triangles splits them so you can feather the blending effect. Click ok.
To control the Burn effect we need to minimize the darken affect from the highlights. So simply drag the white triangles to the left and splits them so you can feather the blending effect, i will keep blending at 128.
Now group everything and add inverted layer mask, hold Alt or option key and click on layer mask icon.
Now take white brush and paint on face to reveal the dodge and burn effect to your preference.
You can adjust the depth of the effect by lower or increasing opacity of the group.
Thats it. We’re done.
[sociallocker id=”1411″][download-attachments][/sociallocker]