Create HDR Bluetone Winter photographs in Camera Raw

In this Photoshop color grading tutorial, we’ll learn how to create HDR bluetone winter photographs in adobe camera raw and also save the settings to use the same effect for other images as well. One of the most challenging things in winter is achieving correct exposure. White, snow-covered landscapes will influence and most likely dominate your camera meter’s exposure reading. This may lead to disappointing results when you discover that all your snow-covered winterscapes are underexposed and appear a dull gray.
For this tutorial, I used Adobe Photoshop Cc 2017 on Windows. Let’s get started!
HDR Bluetone Color Effect Tutorial :
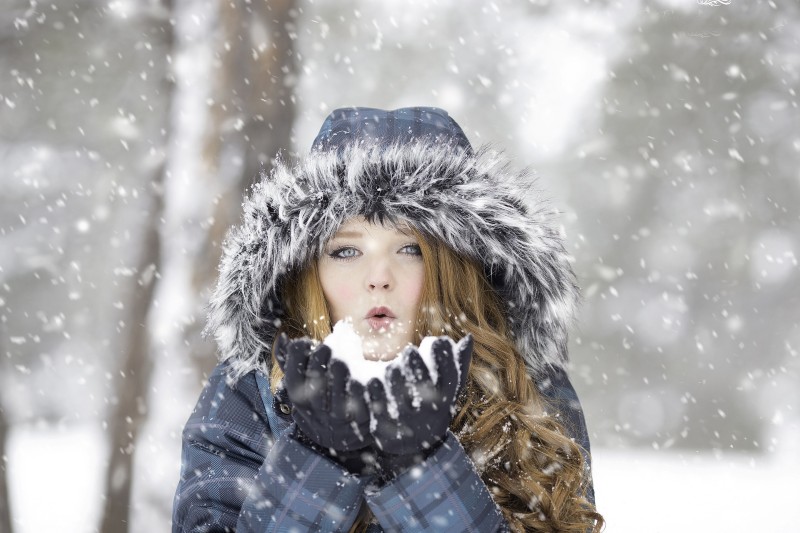
Open the image you want to edit in Photoshop and duplicate it.
convert layer to smart object.
Now open image in camera raw filter.
now i’m going to adjust some basic adjustments to achieve the effect.
This is a great tool for darkening blue, adding definition, eliminating glare and adding more saturation to colors.
Switch between panels by clicking on the tabs. Select Detail Panel.
The top half is where we do all of our image sharpening, while the bottom half lets us reduce any luminance or color noise.
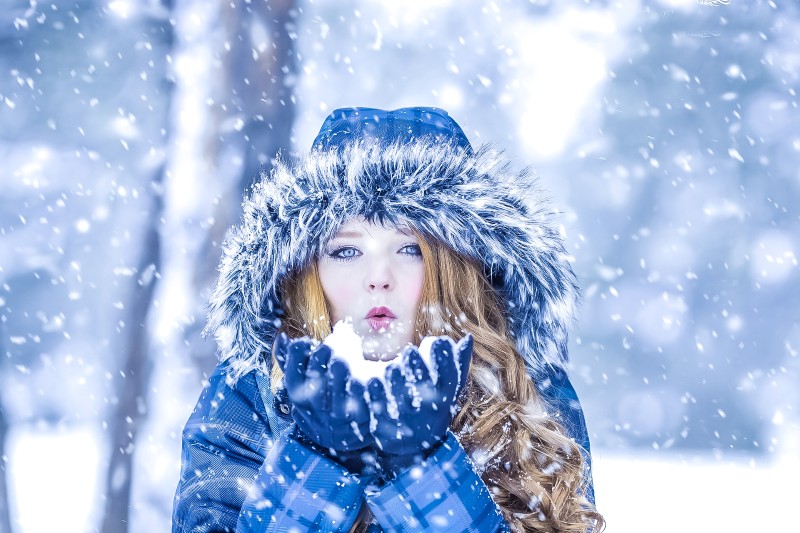
And…that’s it! Our bluetone HDR photo effect is pretty much done! You can see my result.
The blue tone almost lets you feel how cold that water must be in the middle of winter …. the contrast range and is technically called HDR (High Dynamic Range).
Now we can save these settings as a preset, and then apply the preset to other photos, that need the same effect or similar corrections.
choose Save Settings from the Camera Raw Settings menu.
The saved settings preset is now available in the Presets tab for any open photo.
Click OK when you’re done to close out of the Camera Raw Filter’s dialog box
Photoshop goes ahead and applies your settings to the image.
Remember that the results may vary on different images. you can play around with temperature, vibrance and colors to get the personal photo effect!
Our channel subscribers can download preset for free from link below, and with just one-click we can add the effect to any photograph. I hope that you enjoyed this tutorial
[sociallocker id=”1411″][download-attachments][/sociallocker]