How to Create Light Painting Effect in Photoshop Tutorial

Light painting is a photographic technique in which long exposures are made by moving a hand-held light source, either to illuminate a subject or to shine a point of light directly at the camera.
Step:1) Fixing Exposure with Shadow/Highlight
I want to make the shadows and highlights of this image even so i use exposure blending for that. Increase the highlights of the image with curves. So we can get shadows details, now add mask and apply image. If we don’t check invert it copies only highlight information but we need shadows details so check invert.
similarly do same process opposite for highlights information. By this we can make shadows and highlights even.
Step:2) Adding Colors for Light
I’m doing this tutorial for light painting effect so i want image to be glowing & diffuse so i will add guassian blur to image. change blending to lighter color. reduce opacity to half.
now i will add gradient colors and change blending and opacity to create a light paint effects.
we can choose any colors but i recommend you to select bright ones.
Step:3) Add Adjustment layers
I will add black layer and change it to softlight for contrast. Add curves and make “S” shape to make darks and white to pop up little. Change blending to screen and adjust opacity.
i will add hue/saturation layer so i can change color of light. Add clipping mask to gradient layer so any changes effects to that layer only. Adjust lightness slider for light intensity depanding on your photos
finally i will add add lens flare to image.
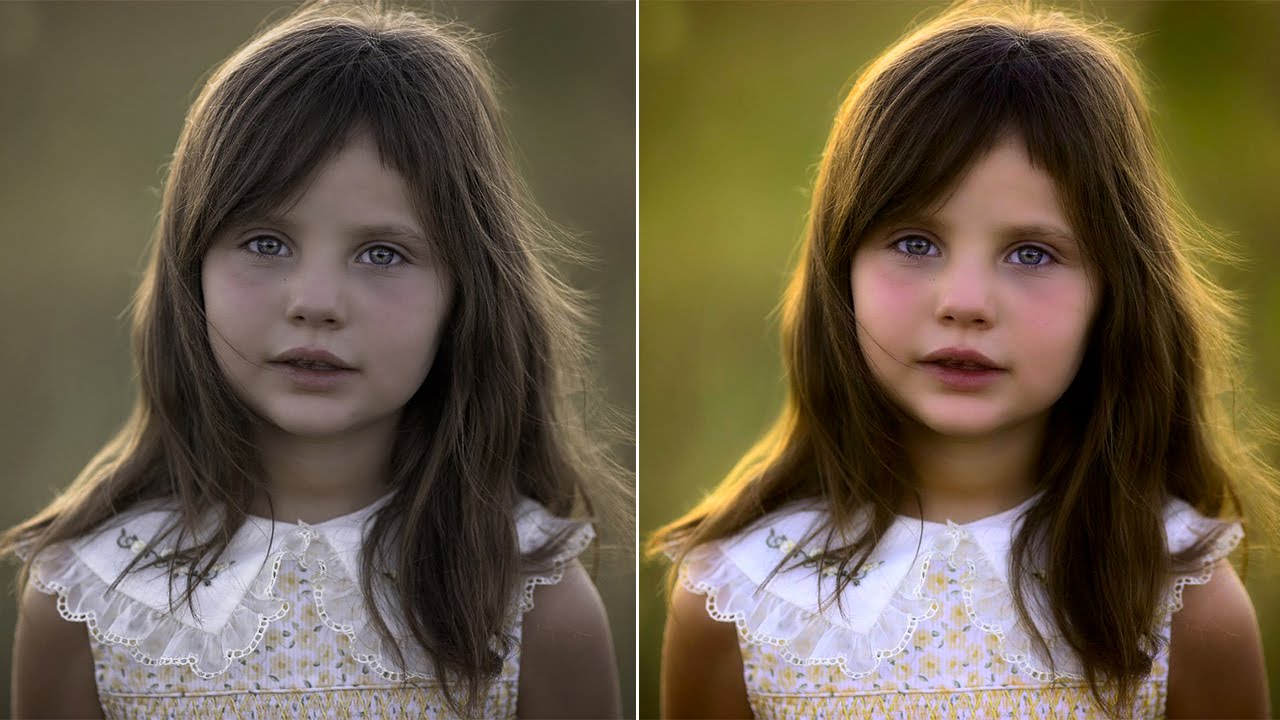
before and after


[sociallocker id=”1411″][download-attachments][/sociallocker]