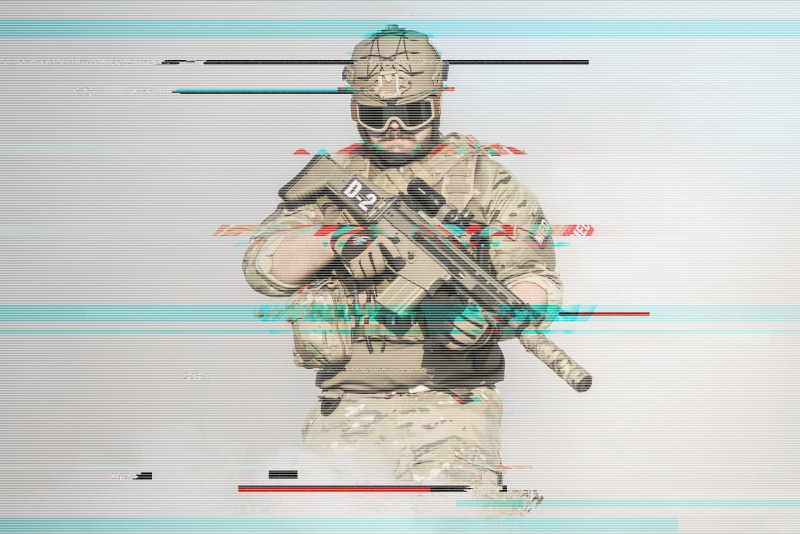
How to Add Glitch Effect to Photos in Photoshop Tutorial

In this photoshop photo effects tutorial, learn how to create a fun photo glitch effect using Marquee Tools, the Wave Filter, and more!
Glitch Effect Tutorial :
CLICK HERE TO WATCH TUTORIAL
00:00:19
Open up image
00:00:27
Duplicate background layer
00:00:36
Double click layer to open the blending options window
00:00:44
Blend Only : Red Channel
00:01:00
Again duplicate background layer, this time change blend only : Green and Blue Channels
00:01:28
Scale cyan layer by width: 127%
00:01:49
Now scale red layer by width: 111%
00:02:08
now we need to create some glitch in the form of misplaced lines
00:02:13
Take retangular marquee and draw selection lines randomly
00:02:43
Select paint bucket tool and fill selection with white
00:02:58
Save the file and similarly create 5 different random misplaced line effects
00:03:09
Back to working project
00:03:13
i already created 5 different lines for this glitch tutorial
00:03:20
Place lines 1 into document
00:03:29
Go to channels and CTRL+CLICK on thumbnail to select lines
00:03:41
Go back to layers panel and select cyan
00:03:47
Then click on add layer mask icon
00:03:58
Now place Lines 2 and repeat the previous step
00:04:18
But this time add layer mask to red layer
00:04:38
Duplicate red layer
00:04:50
Scale red copy by width: 110%
00:05:04
Now place lines 3 and add layer mask for red copy
00:05:33
Duplicate background layer
00:05:42
Add ripple filter to the layer
00:05:55
Keep amount: 93 and size: large
00:06:11
Now add wind filter
00:06:21
Keep method: blast and direction: left
00:06:38
Take paint bucket and fill brighter areas with black
00:06:48
Add noise to the layer
00:06:58
Distribution: Gaussian, Amount: 14% with monochromatic
00:07:09
Now place lines 4 and add layer mask to background copy
00:07:40
Duplicate background layer for a final time
00:07:53
Go to filter gallery and select ocean ripple
00:08:06
Keep ripple size: 12 and magnitude: 11
00:08:17
Add wave to current layer
00:08:29
Keep wave type: sine and number of generations: 1
00:08:41
Keep length, amplitude and scale as follows. Choose Repeat Edge Pixels
00:08:52
Now scale current layer by width: 110%
00:09:07
Place lines 5 and add layer mask to the layer
00:09:31
we can delete these lines layer
00:09:44
Now create glitch lines. Add new blank layer
00:10:06
Fill with 50% grey
00:10:15
Go to filter gallery and apply halftone pattern
00:10:31
Keep size: 1, contrast: 50 and pattern type: line
00:10:41
Change layer blending to screen and reduce opacity.
00:11:06
Add curves and adjust midtones to reveal more lines
00:11:29
You may apply curves to any layer with clipping mask
00:11:52
Adjust colors with hue/saturation (optional)
00:12:17
That’s it.
00:12:31
i created action to this effect
00:12:41
Firstly download and install the action in your photoshop
00:12:48
Open image and click the play button to run the action
00:13:03
With in seconds glitch effect will be added to the photo
00:13:18
Download this action from my website

[sociallocker id=”1411″][download-attachments][/sociallocker]