How to Create Clear & Vibrant Photos in Photoshop

In this Photoshop tutorial, I will show to you how to get clear & vibrant photographs using Adobe Camera Raw.
Clear & Vibrant Effect Tutorial :
Adobe Camera Raw is a plug-in for Photoshop that was initially designed for processing and editing photos. Adobe added the ability for Camera Raw to edit JPEG, and TIFF images as well.
In this tutorial, we’ll create a clear and vibrant color preset in Camera Raw.
First duplicate background layer and Convert Layer Into A Smart Object.
Go up to the Filter menu in the Menu Bar along the top of the screen and choose Camera Raw Filter.
This opens Photoshop’s Camera Raw Filter dialog box, with the image appearing in the main preview area.
Now we are on the Basic Panel with some of the basic adjustments.
First, to tone down the highlights, click on the Highlights slider and drag it towards the left.
Then, to lighten the shadows, click on the Shadows slider and drag it towards the right.
To increase the contrast in the midtones, click on the Clarity slider and drag it towards the right.
Adjust vibrance and saturation, it makes every color in the image more colorful.
The contrast slider expands the overall range of tonal values in the image.
Now lets adjust edge definition in the image with sharpening slider.
The Noise Reduction sliders has controls for reducing image noise, the extraneous visible artifacts that degrade image quality.
Now we can save these settings as a preset, and then apply the preset to other photos, that need the same effect or similar corrections.
choose Save Settings from the Camera Raw Settings menu.
In the Save Settings dialog, check which of your custom Camera Raw settings are to be saved in a preset.
Enter a name (preferably one that describes the function of the preset), keep the location as the Develop Settings folder, then click Save.
The saved settings preset is now available in the Presets tab for any open photo.
finally, now make color and tonal adjustments with temperature and tint sliders.
Click OK when you’re done to close out of the Camera Raw Filter’s dialog box
Photoshop goes ahead and applies your settings to the image.
we applied the Camera Raw Filter to a Smart Object, it was added as a fully editable Smart Filter. If you want to go back and re-edit any of the settings for the effect
Now try to apply this preset to other photos and with just one-click we can add the effect to any photograph.
when your happy with the result, click ok to apply.
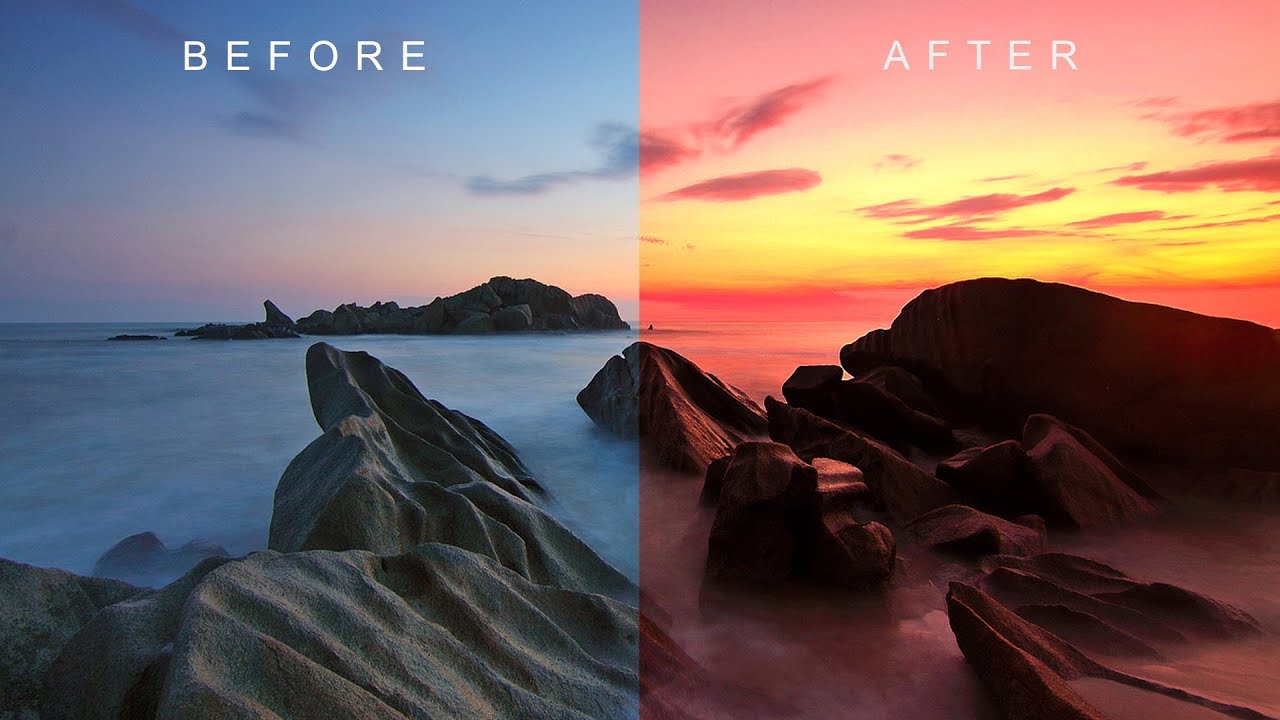
We’re Done. Here is before & after results. I hope that you enjoyed this tutorial.
[sociallocker id=”1411″][download-attachments][/sociallocker]