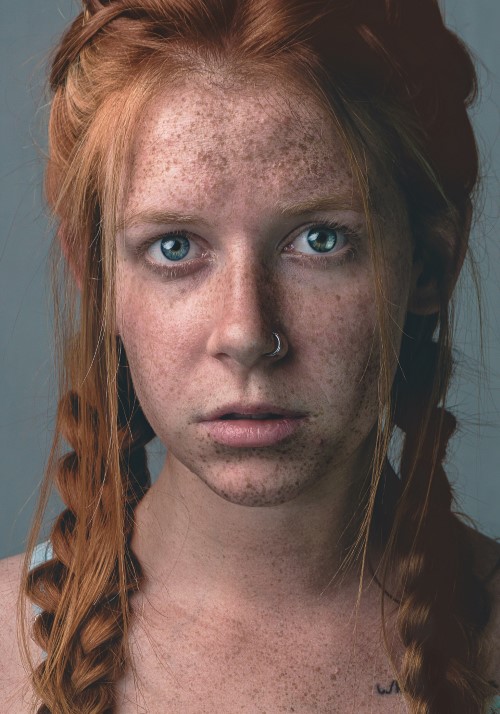
ENLARGE Eyes Naturally in Photoshop!

In this tutorial, we will learn how to enlarge eyes naturally in Photoshop. However, we won’t be using the Liquify tool as it may not give you realistic and natural-looking results. Instead, we will use another method to achieve the desired results. Here are the steps you can follow to enlarge eyes naturally in Photoshop:
ENLARGE Eyes Naturally: Photoshop Tutorial:
Step 1: Duplicate the Layer
Firstly, duplicate the layer of the image you want to edit.
Step 2: Use Lasso Tool
Use the Lasso tool and zoom in a little bit to make a selection around the eyes, including the eyelashes.
Step 3: Remove or Add Areas
Press and hold Alt and delete the selected area that you do not want or press and hold Shift to add areas you want to include.
Step 4: Smoothen the Selection
To smoothen the selection, press the “Q” key, which will get you into Quick Mask mode.
Step 5: Apply Gaussian Blur
Now, go to Filter > Blur > Gaussian Blur. Increase the blur so that the selection is smooth but doesn’t go into the eyelashes or any part of the eye. 18 pixels would be a good value for blur.
Step 6: Create a Separate Layer for the Eye
Press “Q” again, and this will return you to the selection. Press Ctrl + J to create a separate layer for just the eye.
Step 7: Adjust the Anchor Point
Press Ctrl + T to transform the layer. Before making the eyes bigger, make sure to adjust the anchor point to the center of the eye, not the eyeball.
Step 8: Make the Eye Bigger
Press and hold Shift + Alt (or Shift + Option for Mac users) and make the eye bigger. Keep the percentages in mind while making the eye bigger. For example, the percentage is around 110%. Hit enter once you’re done.
Step 9: Repeat Steps for the Second Eye
Select the background layer again and repeat Steps 2 to 8 for the second eye. However, this may be a little tricky as there may be some hair around the eye.
Step 10: Make the Corners Appear More Realistic
Create a mask and take the brush, making sure that the foreground color is black. Paint in the areas that need to be erased. Start painting with a flow that is fairly low, maybe 20 is good, and start painting at the edges to bring back the hair.
Step 11: Warp the Layer
Press Ctrl + T and select the layer. Right-click on it and go to Warp. Adjust it as needed.
Step 12: Group the Two Layers
Group the two layers, and that’s it! You can now check out the before and after of your image.
I hope this tutorial helps you learn how to enlarge eyes naturally in Photoshop. If you found this helpful, please give it a like and don’t forget to subscribe to my YouTube channel for more tutorials.

►SUBSCRIBE to my YouTube Channel: CLICK HERE
►JOIN or Become YouTube Member for Direct Downloads: CLICK HERE
►Support Me on Patreon for Instant Downloads: CLICK HERE
![DayTime Long Exposure Photography Without ND [Neutral Density] Filter Tutorial](https://photoshopdesire.com/wp-content/uploads/2016/05/DayTime-Long-Exposure-Photography-Without-ND-Neutral-Density-Filter-Tutorial.jpg)