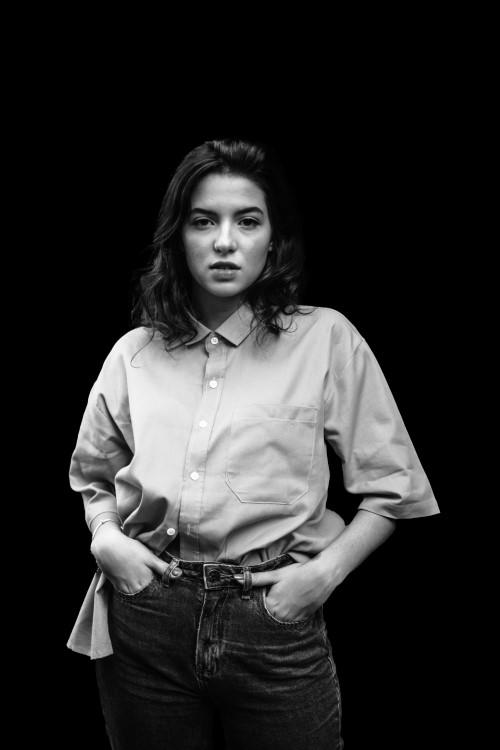
How to Achieve Low Key Photography Effect in Photoshop

Learn how to achieve Low Key Photography Effect in Photoshop. Today, we’re going to learn a really cool trick in Photoshop that will allow us to transform an outdoor portrait into a studio-quality low key photograph!
Low Key Photography Effect – Photoshop Trick:
The first thing we need to do is select and mask the subject. Don’t worry if it’s not perfect – we just need a decent selection for this effect. Once we’ve done that, we’ll output it as a new layer with a layer mask.
Next, we’ll add a solid color adjustment for the background. We want the background to be pitch black for this effect, so we’ll select black as our color.
Now, we’ll add a gradient map to convert the image to black and white. We’ll choose a black to white gradient and place a grey color in the middle. This will give us more control over the mid-tones.
So far, so good! Now, we need to brighten up the bright areas a bit. We’ll use a curves adjustment to do this, but we only want to apply the effect to the bright areas, not the shadows. We’ll do the same thing for the dark areas – darken them slightly, but only apply the effect to those areas.
Finally, we’ll add a brightness/contrast adjustment and adjust the brightness to our liking. We’ll also open up the gradient map again and adjust the grey handle to control the mid-tones.
Once we’re happy with our image, we’ll group all the layers together and name them “Low Key Photo Effect”. If we want, we can add a noise filter at the end to give the image a more realistic look.
And that’s it! Here’s the before and after.

►SUBSCRIBE to my YouTube Channel: CLICK HERE
►JOIN or Become YouTube Member for Direct Downloads: CLICK HERE
►Support Me on Patreon for Instant Downloads: CLICK HERE