How To Transform Photo into Anaglyph 3D Effect in Photoshop
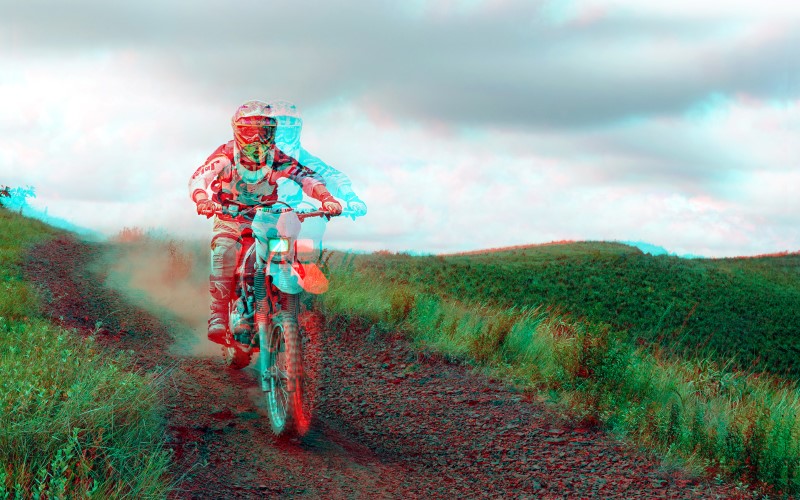
In today’s tutorial I’m going to take you through the process of how to create some really cool Anaglyph 3D Effect images that pop out from your screen. Grab yourself some old school 3D specs and follow this guide to learn how to produce your own anaglyph 3D images in Photoshop.
Open your single image in Photoshop.
First duplicate the background image and name it CYAN & we use it as the right eye image.
Now we need to convert this image into cyan tone.
Double click the top layer to open up the Layer Style options. Uncheck the Red channel then hit OK.
Now duplicate background image again, name it RED and we use this image layer for left eye.
Now change the layer tone to red, Open the Layer Style options for the red layer, but this time uncheck both the Green and Blue channels. We just created the left and right eye images.
When u close ur left eye & see any object with ur right eye it looks like the object shifted towards left side.
Similar when u see any thing with left eye that the object looks shifted towards right.
As mentioned, right eye cyan image shifts to left. So Nudge The “cyan” Layer To The Left.
Hold SHIFT and press left arrow key 3 times. If u want more 3D depth press left arrow 5-6 times. it gives more 3D depth
Similarly Nudge The “Red” Layer To The Right. use the right arrow key on your keyboard to nudge the layer the same distance as the “CYAN” layer but in the opposite direction.
We just finished creating 3D stereoscopic image. But if u look at the edges there are some solid coloring.
Use the Crop tool to trim the document to the area where both layers overlap or simply turn on the background layervisibility. Here background layer works as a base layer for 3D image
here is before and after.
In order to follow along with this tutorial and see this image in full effect you will need to acquire some 3D glasses with red & cyan lenses.
You can find the original white card style glasses online which work perfectly well.
[sociallocker id=”1411″][download-attachments][/sociallocker]


