Removing Color Lighting from Photos in Photoshop

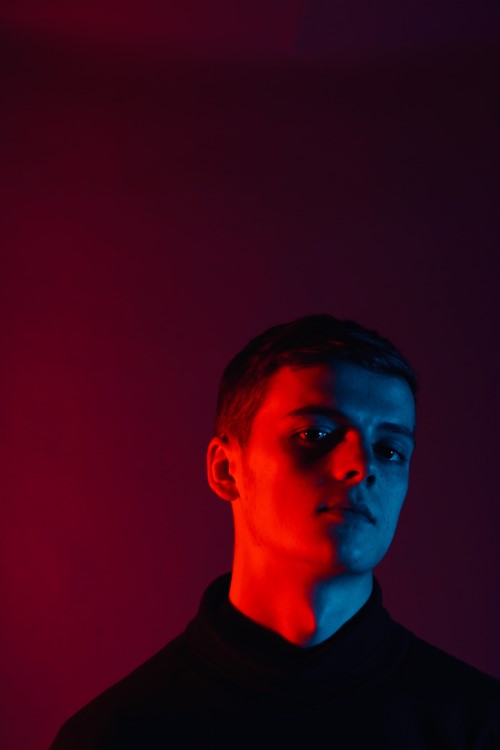
In this tutorial, Learn Removing Color Lighting from Photos in Photoshop. I want to show you a quick and easy way to fix photos with bad lighting in Photoshop. You may have a photo that looks good with some nice color gels applied to the subject’s face. This kind of look can be fashionable, but what if you want to remove those color lightings from the face and restore the original skin tones with just one click? Well, it’s possible, and I’ll show you how.
Removing Color Lighting from Photos – Photoshop Tutorial:
Firstly, duplicate the background layer by right-clicking and selecting “duplicate layer”. This will ensure that we don’t damage the original image.
Next, go into the “Filter” menu and choose “Neural Filters”. These filters use machine learning technology to create effects. Scroll down to the “Colorize Neural Filter” which is meant to colorize black and white images. But, you can also use it to fix photos with lighting problems as well.
Simply turn on the colorize button, and it will automatically correct the lighting problems. The results are amazing! It perfectly resets the skin tones to their natural state. However, some areas like the background may not be perfect.
To fix these imperfections, click on the areas that need fixing. The color picker will open up, and you can select the color of your choice. For instance, you may want to apply grey color to the background to give it a neutral look.
You will find color adjustments similar to the color balance tool. While there’s no need to use these adjustment sliders, I will add a little blue to the image for a cool and calming effect.
Now, output the layer as a new layer or a smart layer. Click “OK” to apply the changes. Since we have already outputted the layer as a new layer, we can delete the duplicate layer.
This technique works great with old photos, portraits, or any photo with poor lighting or an unwanted color cast. And the best part is that it’s a quick fix that can be done with just a few clicks.
That’s it for this tutorial. I hope you found it helpful.

►Sample Image for Practice: CLICK HERE
►SUBSCRIBE to my YouTube Channel: CLICK HERE
►JOIN or Become YouTube Member for Direct Downloads: CLICK HERE
►Support Me on Patreon for Instant Downloads: CLICK HERE